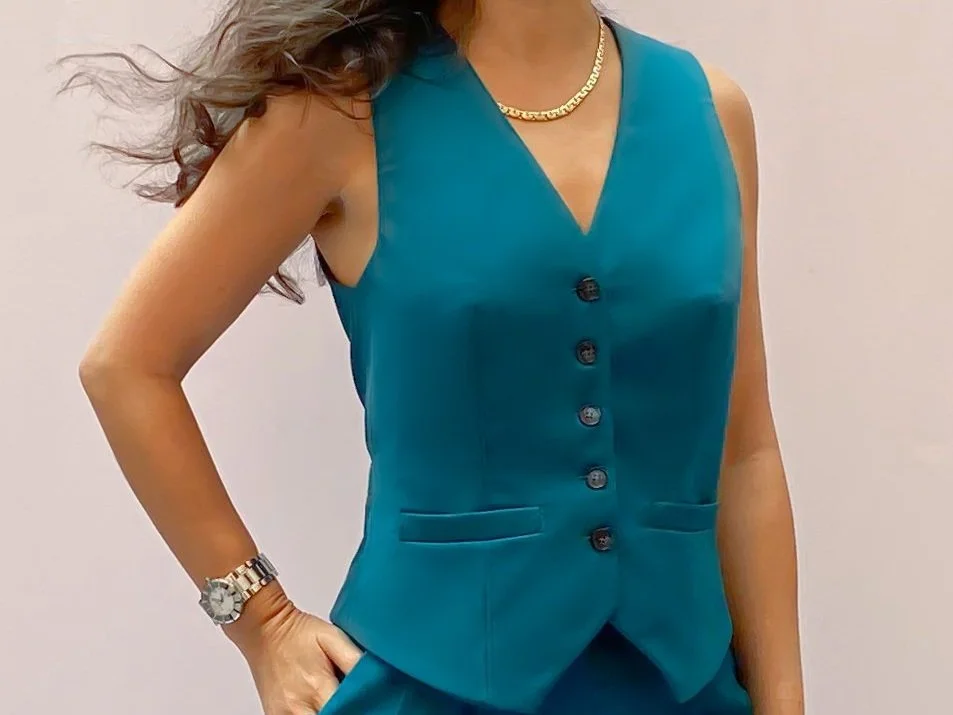
Veronica Vest - Front darts and welt pockets tutorial
Delphine (Sewing Tidbits)
Hello readers!
I got a couple of questions on the construction of the welt pockets of the Veronica Vest, and it reminded me that I had taken pictures of my construction in preparation for a tutorial, but then I completely forgot about them! All this to say that if you have a question, do reach out. I really appreciate it!
I initially thought I would do a tutorial on the welt pockets only, but I realized that the front dart construction has also generated questions so today, I will be addressing both at once. If you follow the instructions, we are covering steps 4 and 5. Before we start, I cannot stress how important it is to transfer markings accurately. It’s always an important step, but with this pattern, you really need to pay extra attention to those internal marks. My preferred method is simplified thread marking, and I demonstrated it in this video on my Instagram account (swipe to see it).
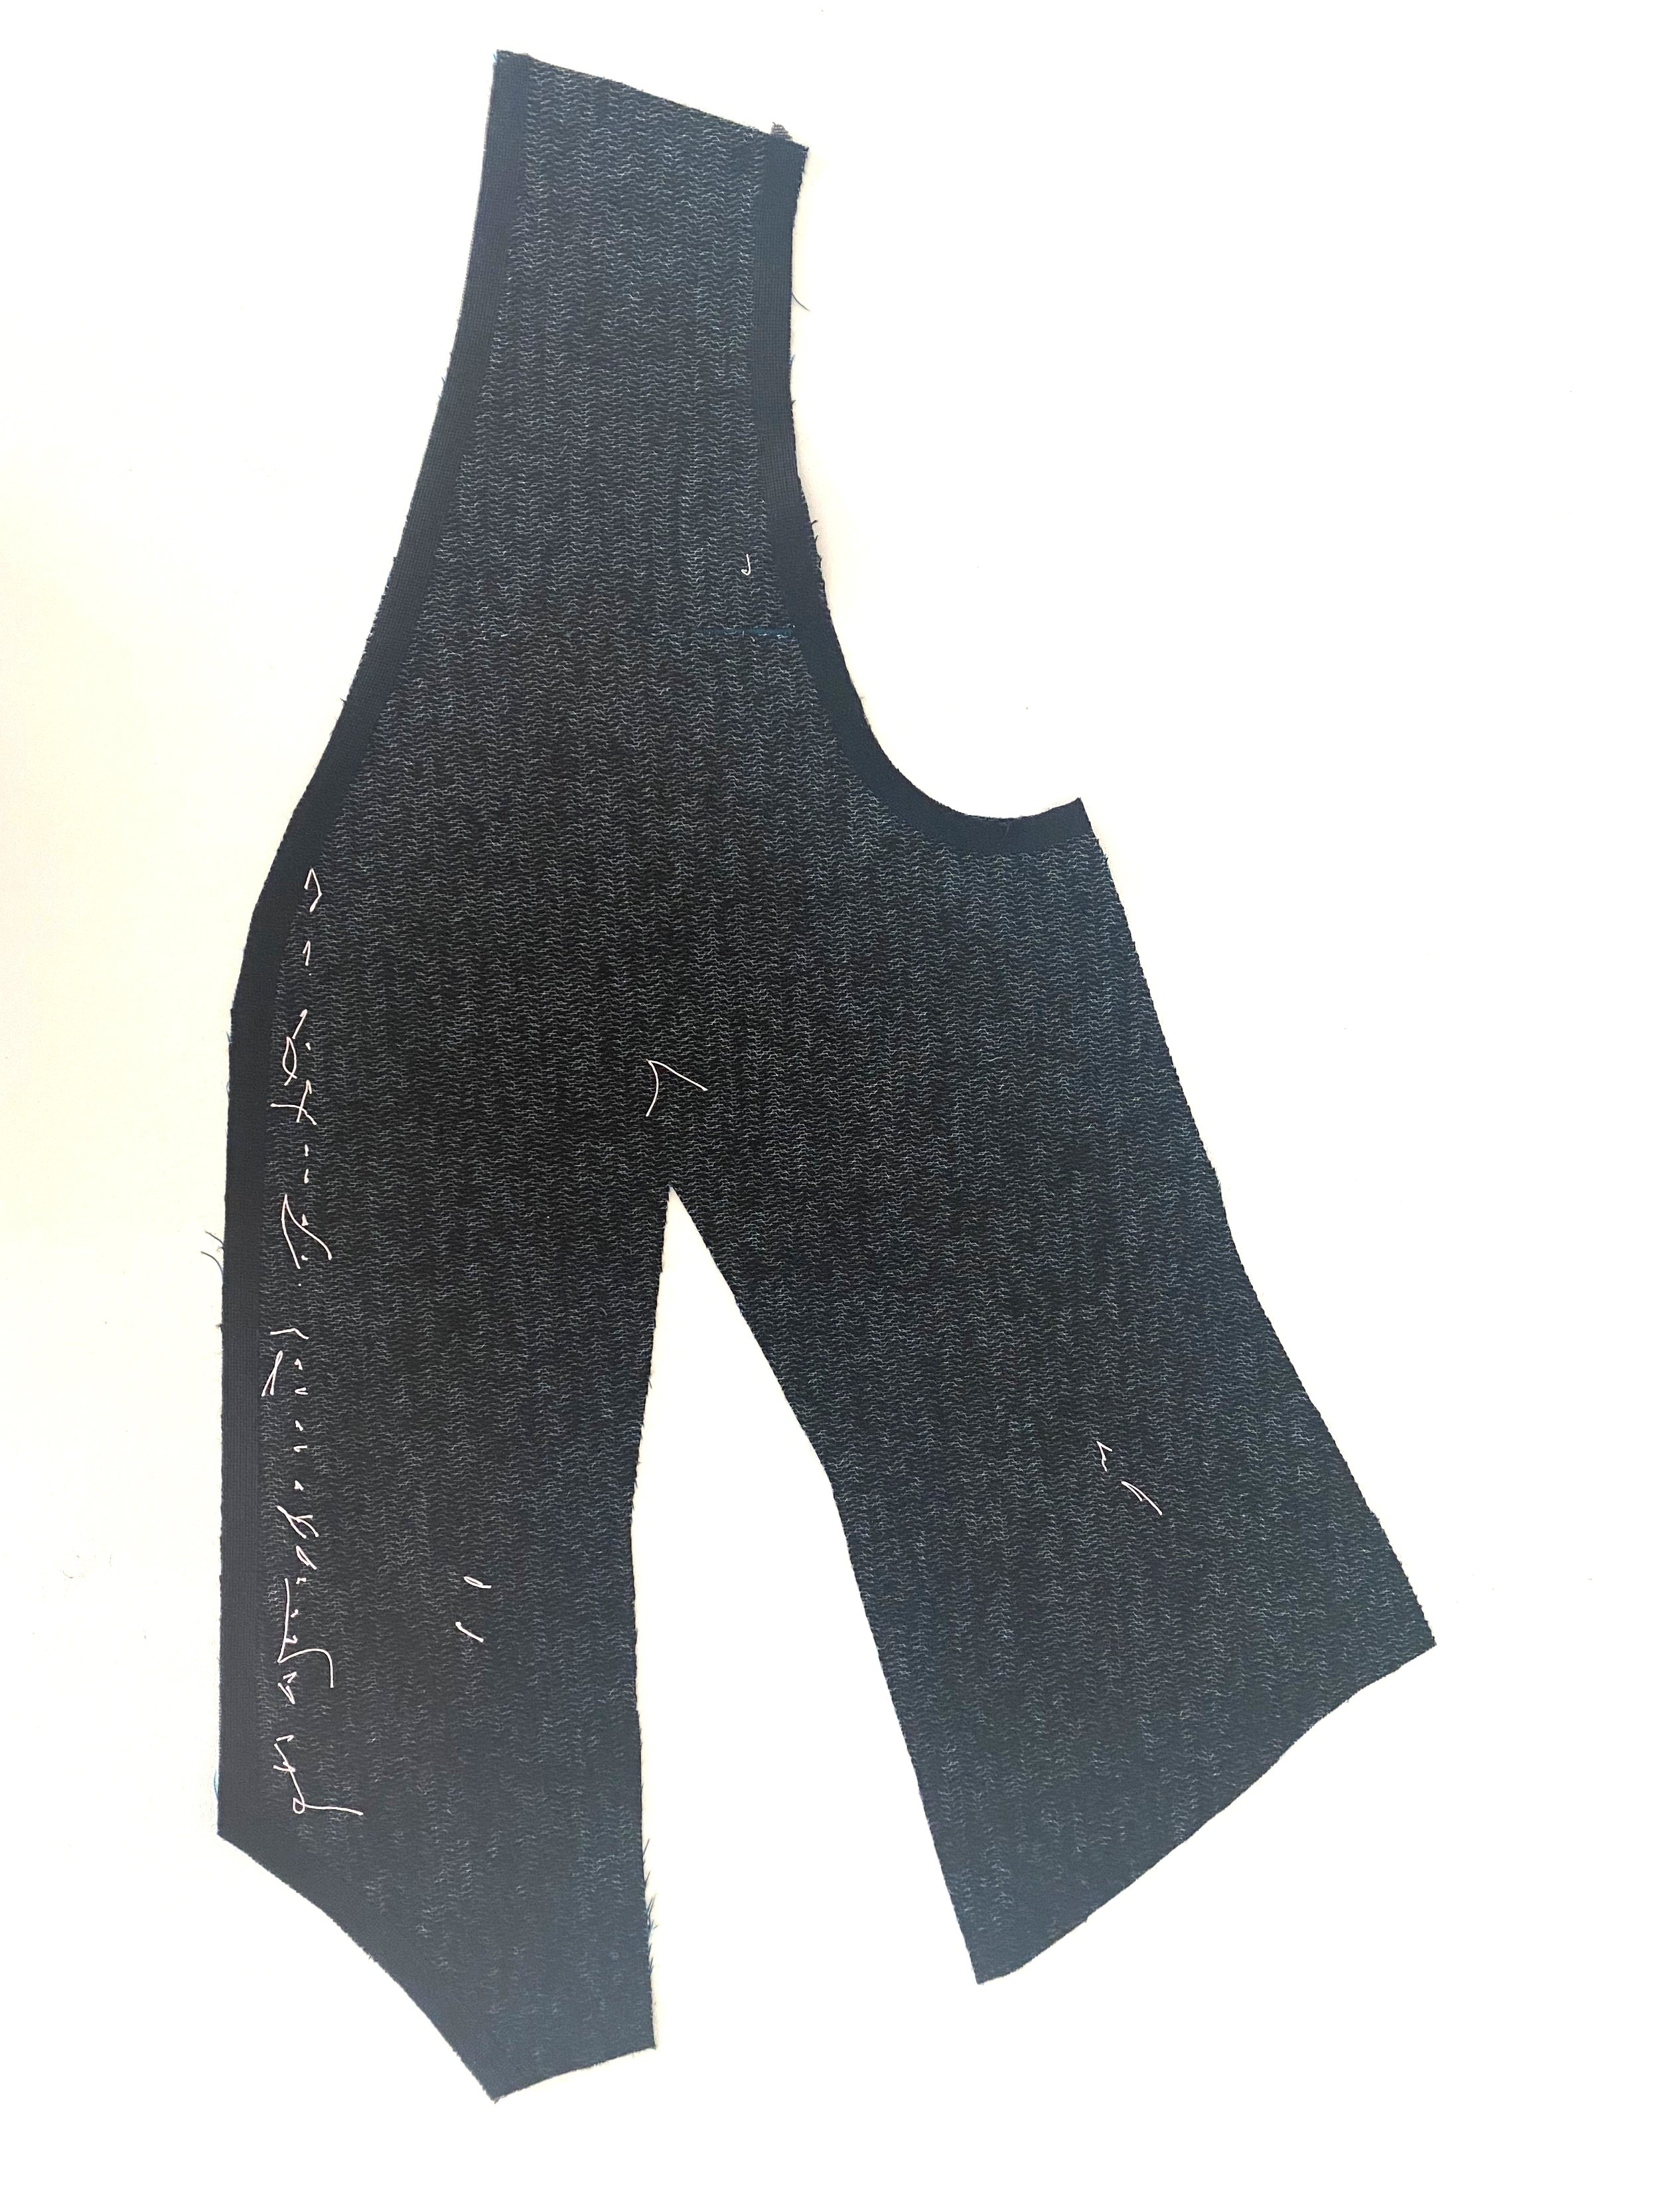

Start by ensuring you have transferred all the markings, in red above. If you blockfused your fabric the front should be already fused, so interfacing will not be a problem.


Pin front dart right sides together, and place a rectangle of self-fabric measuring 1 3/4" by 3/4" / 4cm by 2cm under the tip. Angle it towards the side seam and center it on the dart stitching line. Start stitching the dart at the bottom with 3/8" / 1cm seam allowances down to nothing at the tip, catching the extra piece of self-fabric. Get closer to folded edge 3/8" / 1cm before reaching the tip to avoid a pointy dart.


Press seams open. Clip dart allowance to press dart tips towards the center front and folded rectangles towards the side seam. You can use a pressing ham to shape the tip with a lot of steam to prevent the dart from being too pointy.
Let’s now move to the welts:


Press the welt piece along the fold line, wrong sides together. Turn so that the right sides are together, and stitch the short side of the welt with 1/4" / 0.6cm seam allowances. Trim the corners, turn so the right side is out, and press.

Stitch the welt to the right side of the upper pocket bag, aligning the raw edges and placing the welt between pocket markings, 1/4" / 0.6cm from the edge. Place the upper pocket bag and welt on top of the front, right sides together. Pin or baste with upper pocket bag marking over lower pocket markings of the front. Stitch in place accurately between markings and over the stitch line that you just did. Start and stop exactly where the welt ends.

Place the lower pocket bag on the front, right sides together. Pin or baste with lower pocket bag marking over the second line of pocket markings of the front. Stitch accurately between markings. The seam is 1/4” / 0.6cm from the raw edge and 1/2" / 1.2cm from the previous seam line. It’s also a little shorter than the previous seam line.

Turn over the front to the wrong side, cut open between the two lines of stitching, forming Vs when you reach the corners.


Pull pocket bags through the opening and press. Baste the welt in place. The top edge of the welt is 1/4" / 0.6cm above your last seam line.

Lift the bottom of the front out of the way and and pin or baste the upper and lower pocket bags together.

Fold the front out of the way so that you can see the triangle and pocket bag. Stitch all-around pocket bags using 3/8" / 1cm seam allowances.

Now all that’s left for you to do, is to turn your work to the right side and slip stitch by hand around the short edges of the welt, turning at the corner and also securing 1/8" / 0.3cm of the top on each side.
That’s it! Now you are ready to continue with step 6 of the instructions: stitching the shoulder seams together.
I hope this was helpful. Let me know if you have questions or comments.