Contact Us

Use the form on the right to contact us.

You can edit the text in this area, and change where the contact form on the right submits to, by entering edit mode using the modes on the bottom right. 


123 Street Avenue, City Town, 99999

(123) 555-6789

email@address.com


You can set your address, phone number, email and site description in the settings tab.
Link to read me page with more information.

Sewing Tidbits

Sewing Tidbits is the sewing blog written since 2013 by Delphine, the co-founder of Just Patterns.

Filtering by Tag: sewing pattern

(re) Introducing the Yasmeen Skirt

Delphine (Sewing Tidbits)

I’m very excited to be (re) introducing a pattern that has been flying under the radar for many years. It is also the last pattern that was pending its update with the new size range and instructions and I could not have been more pleased to finally have an updated catalogue before the end of 2022. Read all about the updates of the Yasmeen skirt!

Read More

Introducing the Alek Rib Top 🎉

Delphine (Sewing Tidbits)

I’m so happy to be introducing a third top to the Just Patterns collection! Can you believe that I started working on this design a year ago? If you followed my adventure on my personal Instagram account, you know that developing this design has been quite a ride. Let me introduce you to the Alek Rib Top.

Read More

Meet the new Linda Wrap Dress!

Delphine (Sewing Tidbits)

After a year of work, I’m so happy to finally be able to re-introduce the Linda Wrap Dress! I’ve loved this pattern since day 1, aka 2017 when it was first released. So when I started working on upgrading Linda, I was committed to doing right, no matter how long it would take.

Read More

SEWN - Festive Road Perfect Hostess (with no one to host)

Delphine (Sewing Tidbits)

If you follow me on Instagram, you already know that due to COVID-19, I had to relocate from Kinshasa to my parents' home in France. Although it's a global dynamic this time, it strangely echoed our last-minute exit out of Haiti last year. When I was talking about leaving Congo, a colleague mentioned that I sounded like I had "unplanned-move-PTSD." As a result, I didn't want to repeat last year's mistake of leaving my sewing room behind, so I packed most of my belongings (and my little human 😉) overnight, including 2 of my 3 machines, all my notions, fabric stash and my 2 projects in progress.

Read More

Stephanie Sewalong - Hong Kong finish and attaching the waistband

Delphine (Sewing Tidbits)

We are approaching the end of our Stephanie Skirt sewalong and I’m so glad that you found those posts useful! In case you are new to this serie, you can check out previous posts here and get the sewing pattern in our shop.

Today, I’ll be showing you how to finish the center back seam of your skirt and attach the waistband.

Read More

Welcome to the Stephanie Sewalong: Inspiration + a fabric discount!

Delphine (Sewing Tidbits)

To celebrate the re-release of the Stephanie Skirt with an improved size range and illustrated instructions, I am hosting Just Patterns’ very first sew-along! I hope that it can help beginner sewists to feel more confident and encourage more experienced makers to try new techniques. Don’t forget to grab your pattern in the shop and let’s start look at some inspiration to help you choose your fabric. I’m very happy to be collaborating with my friends Dibs, who just launched her online fabric store Selvedge and Bolts, and she is generously offering 20% a selection of fabric that would be amazing to sew Stephanie, check out the code at the bottom of this post!

Read More

SEWN - Another take on the Stephanie Skirt

Delphine (Sewing Tidbits)

I'm slowly climbing out of the overwhelmed single working mom hole although I have to acknowledge that I may fall right back into it at any time. Life has a thing for intently proving me wrong every time I start feeling like things are under control. But before that happens, I'm trying to get as much sewing and photographing done! The skirt I am showing you today has been on my mind since November.

Read More

Getting started with Just Patterns

Sewing Tidbits

The information we include with our patterns may be less detailed than what you are accustomed to, but they should provide enough information for an intermediate sewer or an adventurous beginner to complete the garment. In this post we'll show you where to locate the most important elements and use the layered PDF functionality. When you buy a pattern in our store, you receive a link to a zip file containing the following :

  • The information file

  • The pattern in print-at-home format (A4 and Letter)

  • The pattern in copyshop format (A0 and US Copyshop 36”x48”)

Below is the cover of our Christy Slip Dress:

Just Patterns - 2101 - Christy Information-page-001.jpg

In the following pages you will find information about the style, fabric recommendations and the cutters must. It summarizes how many of each pattern pieces you need to cut in each fabric (self, lining, fusible, etc.). As well as other pieces for which paper pieces are not provided, such as bias strips. It also includes the technical drawing of the garment and an estimation of fabric requirements. We currently do not include cutting layouts because of how much they can vary  depending on the size you are cutting and the width of your fabric.

Just Patterns - 2101 - Christy Information-page-002.jpg

The Christy Slip Dress is currently available in size 34 to 46 and the pattern includes negative ease. We recommend choosing your size based on your bust measurement for this pattern.

Just Patterns - 2101 - Christy Information-page-003.jpg

Next is the printing layout that will help you put together the pattern after printing it.

Just Patterns - 2101 - Christy Information-page-004.jpg

The following table is a suggested order of operations. This is the order we used to sew the samples shown on the cover. But if you are making changes to the pattern, for instance you decided to make the pattern single layer and finish the edges with bias binding, then these operations will be quite different. The table is designed for you to check at a glance the width of the seam allowances and type so you don't have to rummage through pages of text to find it.

Just Patterns - 2101 - Christy Information-page-005.jpg

In case you need more help, links to tutorials, videos, etc. are available in the resource page of each pattern. Finally, you'll find the hashtags to share your work on social media. For the slip dress it's #christyslipdress and for the camisole it's #katebiastop (there is another Kate Top sewing pattern out there by Tessuti, so don't forget to add the bias!).

Now let's have a look at the pattern files! The layers are enabled in every printing format. When you open your pattern in the Adobe Acrobat Reader, use the layers tab on the left of the screen and select only the size you need but keep "print marks" and "all sizes" activated. As you can see above, the pattern pieces extend beyond the cutting marks. This should make it easier for you to put it together. You will also notice that the seam lines are printed on all pieces. This is why we strongly recommend you use the layer function. Otherwise it can get quite busy, even for a simple pattern.

Just Patterns Layered PDF

We hope that this post was useful and we will be back soon for some actual sewing posts! Don't hesitate to reach out in the comments or anywhere else if you would like more information! Do you see a Christy or a Kate in your near future?

Sewing Bias - Introduction and Inspiration

Sewing Tidbits

Dear readers,

Today, I wanted to talk a bit more about our two bias sewing patterns: the Christy Slip Dress and the Kate Bias Top. Both patterns are strongly inspired by our favorite fashion decade, the 90's. We just love the era of supermodel and clean lines.The dress hits below the knee and has a flattering rounded neckline, while the top features a sexy V, but they come from the same block, so you can easily interchange necklines. The simple lines of those designs lend themselves to endless possibilities to suit your fancy. You can choose a beautiful silk, make it double layer and add delicate details such as french seams, a baby hem and tiny spaghetti straps to achieve the perfect party dress or top. We promise you that you will never feel under or over dressed!

But you can also decide to make them as luxurious sleepwear or undergarments, with a single layer of silk charmeuse, bias binding and adjustable lingerie straps or try cotton batiste to stay cool on those hot summer nights. And if you feel like going even fancier, how about some lace appliqué around the neckline or the bottom edge?

We created Pinterest boards for you to browse and get inspired, we'll keep adding more so don't hesitate to follow them!

https://www.pinterest.com/justpatterns/2101-slip-dress-inspiration/https://www.pinterest.com/justpatterns/3101-bias-tank-top-inspiration/

Our upcoming posts will feature specific techniques and tutorials as well as versions sewn by you! Grab your patterns in the shop and share your slip or our camisole with us on Instagram (#katebiastop #christyslipdress) or in our Facebook Community Group!

Introducing: the Linda Wrap Dress sewing pattern

Sewing Tidbits

After literally months of teasing on Instagram, we are thrilled to finally release our newest sewing pattern, the Linda wrap dress! This dress is a favorite of both Eira and I as it is the perfect garment to be dressed up and yet still comfortable. Add the Linda to your handmade wardrobe and we promise that it won't ever let you down!Our wrap dress has a relaxed fit with gathers in the front and the back of the bodice and skirt. The sleeves feature a with a two piece placket and a cuff closed by a button. Their mid-length makes it a perfect choice all year round to wear in the office to fight the freezing A/C in the summer and or the crazy over heating radiator. They provide coverage but won't get in the way!

Linda wrap dress by Just Patterns

It's truly the details that make this dress special. The bias cut collar sitting at the base of the neck. The super practical side pockets and the double top stitching elevate a wardrobe basic to a special piece that you will reach for over and over.The cream color sample shown is made from a heavier 4 ply silk, while the black one was made from a wool blend crepe. Both fabrics are characterized by a nice drape, therefore we recommend woven fabrics with body and drape for this pattern.The waistband has an interesting a belt closure. We recommend a 35mm metal buckle but we can't wait to see what creative alternative solutions you are going to come up with. Seeing your interpretations is the best part of designing sewing patterns! For the eyelets, you can use 2-piece metal ones with the ring (they provide a cleaner finish on both sides and the eyelet alone, or you can embroider them just like buttonholes. If you are in the New York City area, we recommend going to Jonathan's Embroidery.

What the pattern includes

The dress pattern is currently available from size 34 to 46 (see our size chart for more information). The pattern includes:

  • a layered PDF with 4 printing options (30 pages in A4, 32 pages in letter Letter, 2 pages A0, and 2 Pages for US Copy Shop 36"x48" and 30"x42");

  • a cutter's must;

  • a suggested order of operations.

We strongly suggest that you make full use of the layered PDF files and print only the size your need, as we include as much information as we can directly on the pattern pieces.

Our patterns are meant for dressmakers who already know the basics of sewing but if you need more help to sew your dress, our dedicated resource page is available. We can't wait to see your versions of the Linda dress. Don't hesitate to reach out to us by email or on Instagram @just_patterns #lindawrapdress!

What is going on with all the big shirts?

Sewing Tidbits

Dear readers,From the reactions to my last post, I gather that you are still around and ready to engage and that's pretty good news! So first I would like to thank all the commenters, I think there was a great conversations going on!One of the reasons for my lack of posting is the fact that I sewed several items I ended up disliking. In my opinion, that's the most discouraging thing that can happen to a seamstress. You have an idea, get excited, find the fabric, the pattern, spend hours making it, try it on and..... Meh. How anti climatic is that? It doesn't help that once I reach  construction stage, I don't like to interrupt myself.I finish all the seams and stop to try on items only just before hemming/adding closures. I usually can get away with it because I know what shapes work on me and I spend time adjusting patterns before cutting fabric. Except these days, I have no idea of how to fit myself because....Squareshirt SewingTidbits-1I'm growing a little human!! That's another reason the blog hiatus, I really really didn't feel like being in front of a camera and all my clothes feel weird.I used to wear fairly fitted clothes, most of the time in the smallest size available, with a defined waist. Obviously all that is gone already and I'm not sure of what's left... I don't really feel like wearing a lot of those tight jersey dresses that seem to be screaming "LOOK AT MY BELLY" but I'm also not use to see myself hidden in voluminous shapes. Tricky time! So I thought about big shirts:After seeing the version made by Paprika Patterns, I decided to try Ralph Pink's Sahara Shirt pattern. I've been tempted several times by his patterns, on the basis that they look "different" from most other Indies, but the sizing seemed too big for me and I struggled finding a pattern I really liked. It probably doesn't help that not a lot of other bloggers have made his garments (with notable exception by Inna and Oona) so I wasn't sure what to expect.https://www.instagram.com/p/BFFrqlrGrPF/I printed the pattern, found suitable cotton-silk in the stash (same as a Vogue 1247 skirt sewn in 2014), cut the smallest size (US 0), sewed and sewed and sewed. It's a relatively quick make, without many seams (although I used french seams everywhere), and they matched well enough. I would recommend checking the length of the front button plackets (I think they were too long) and the side seams but there was nothing truly catastrophic... Until I tried on the shirt. I could not picture myself going around the city is what looked like A GIGANTIC TENT!!I put it away my sewing friend from the Pattern Line came over and convinced me that all it needed was taking in the sides a little. By a little, I mean 3" on each side seams... The total reduction is 12" (!!) tapered to nothing at the underarm. I also removed some of the extra length at the back to soften the curved hem effect. But you know what? Now, I actually really like it! As you can see, I didn't lie when I previously said that blog posts would have less pretty pictures... Next time I will tell you about my iteration in white poplin (in the first picture).In the mean time, I would love to hear your thoughts on those pattern companies that seem less popular among sewing bloggers, does it stop you from trying them out?  

Anachronistic sewing - still stuck on Archer shirt

Sewing Tidbits

wpid862-modified-archer-4.jpg

Dear readers,I rarely manage to make-up the "trendy" sewing pattern at its trendy time. While you all finished your Alder shirt dresses, I still sew Archers. In addition, when Alder first came out, I could not wait to make it up, but now I am having second thoughts. A-line may not be that flattering on me after all.Also, unrelated to this post, I wanted to thank all of you who shared their thoughts on my last post. It is definitely something I could talk about all day but I will spare you and only add 2 things :

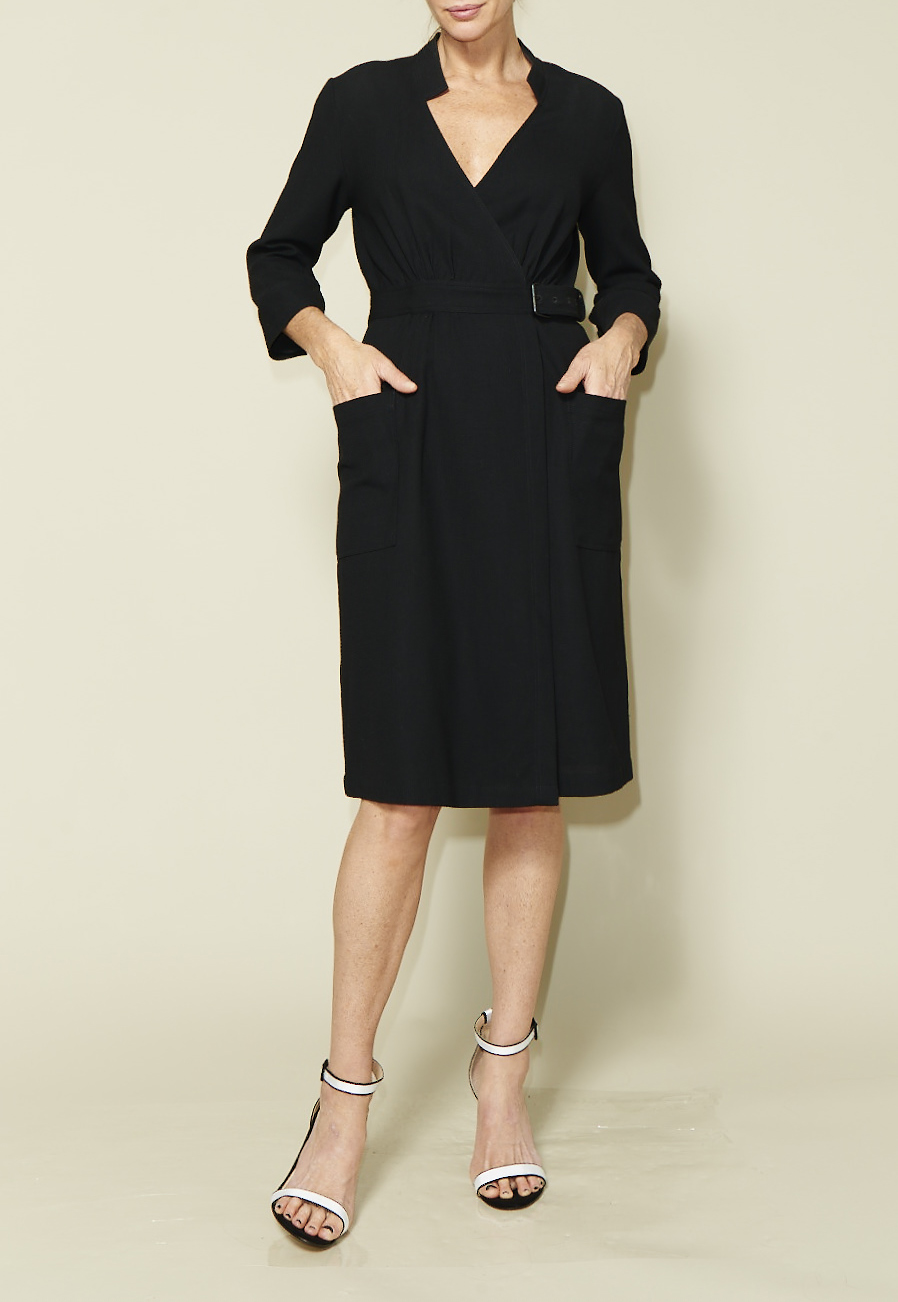
  • Can you get more disappointing than this? This dress is in any big 4 catalogue, burda magazine and you can get a customized pattern by Lekala. What are you bringing to the cutting table? Apart from pulling at the bust. No, I'm not nice, I  know.
  • Hope for collaborative sewing exists. Lovely reader Miranda emailed me about this PR conversation that I had missed. Seeing how the community can engage in a project all together is heartwarming . I would not make that pattern because it's not my style but it seems to appeal to many. My only regret is that the result of this awesome collaboration is yet another simple knit pattern for sale... BUT it should not detract from how great it is to witness all the contributions.

Now back to the shirt! Pictures are still from my Iphone, but for once the location is NOT my garden, YAY! My dog is therefore NOT in the background, (NAY?). I spent a week by Lake Atitlán in Guatemala (highly recommended) in August and I packed some garments to photograph on the beautiful terrace of the house we rented.wpid858-Modified-Archer-2.jpg
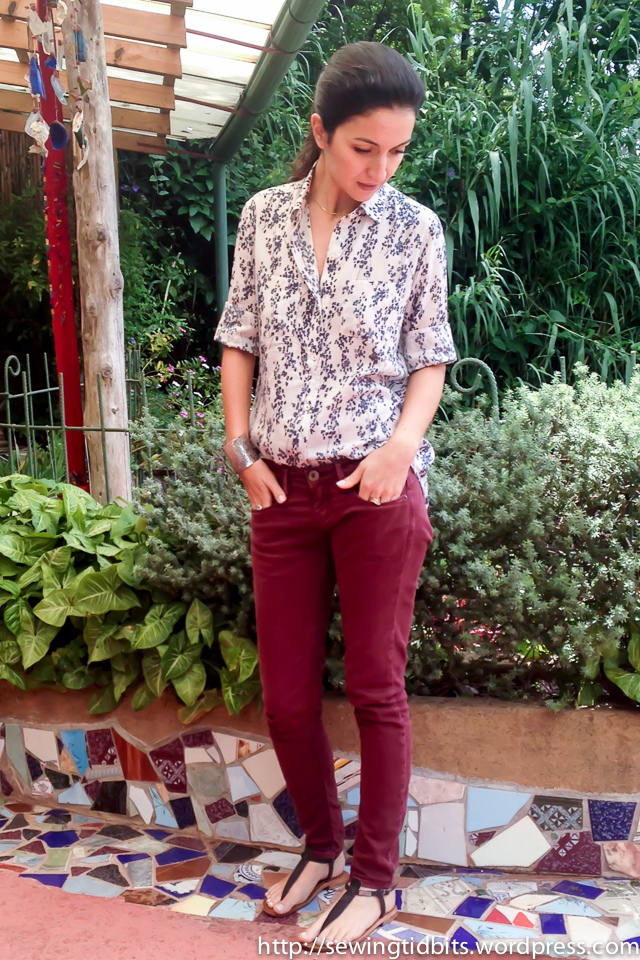
Please note that this is not the pattern straight out of the printer. I was happy with my first version of the shirt (see my shirtdress version) but I want to create a TNT pattern for boyfriend shirts and I am glad to report that it is almost a success. To guide my fit alterations, I used a Banana Republic shirt I love. I measured elements like shoulder length, waist shaping, pocket placement, final length, etc. Beth's post on Craftsy is timely as it is exactly what I did!wpid856-Modified-Archer-1.jpgMain fit alterations:

  • adding 3" of overall length, and note that I am only 5'3". But I like my shirts tucked in and I want to raise my arms without exposing skin.
  • Shortening the shoulder length by and adjusting the yoke accordingly

Archer alteration

  • Removing most of the sleeve ease at the underarm seam and reshaping the sleeve head a little (for an idea of how, you can check this post at Fashion-Incubator)
  • Further shaping the waist at the side seam
  • Shortening the sleeves

wpid862-Modified-Archer-4.jpgI also tried to use more advanced sewing techniques, and I will do a detailed post. Some worked (tower placket, button placket, cuff construction) and some did not work at all (ouch, collar+stand). Sometimes, a "if it's not broken, don't fix it" approach is best. I never had a problem with  stand collar construction before so why did I try to find a better way to do it? Don't know... Some of my techniques required pattern alteration or drafting of extra pieces. Look out for the post next week soon!wpid864-Modified-Archer-5.jpg
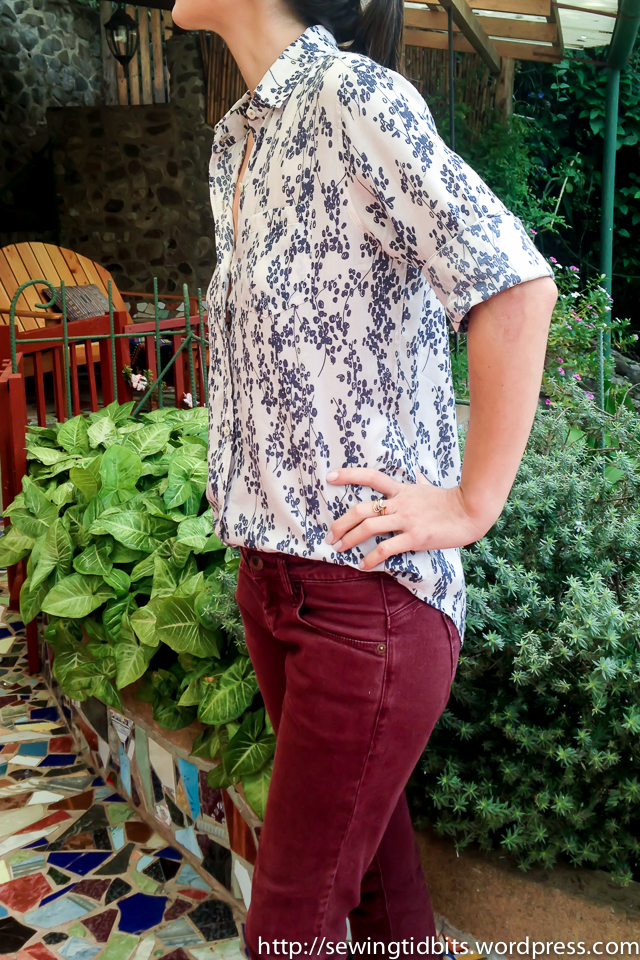
I am planning my next shirt with further alterations. The final pattern may have little to do with the original Archer but I still believe that it was a great start. It produces wearable garments from the first trial and can be altered easily. Next time, I want to tackle the collar & stand: the collar could be wider and the stand should close at a 90 degree angle (this is what I mean). I will also start adding darts to the back so it remains relaxed but more fitted. Finally, further shortening of the sleeves is necessary (creepy baby length arms, again), sad...wpid860-Modified-Archer-3.jpgI almost forgot to tell you that the fabric is one of the pieces I brought back from Paris last June. I found it at the cotton stand of Marché St Pierre. However, looking at the drape I guess some rayon is thrown in.While I prepare my post on shirt construction, I would love to hear from you your favorite shirt making tutorials. I am familiar with the Archer Sew-along, Fashion-Incubator, Off the Cuff, Male Pattern Boldness and Sewing Square Walls but I may be missing on important ones! Please, fill me in!
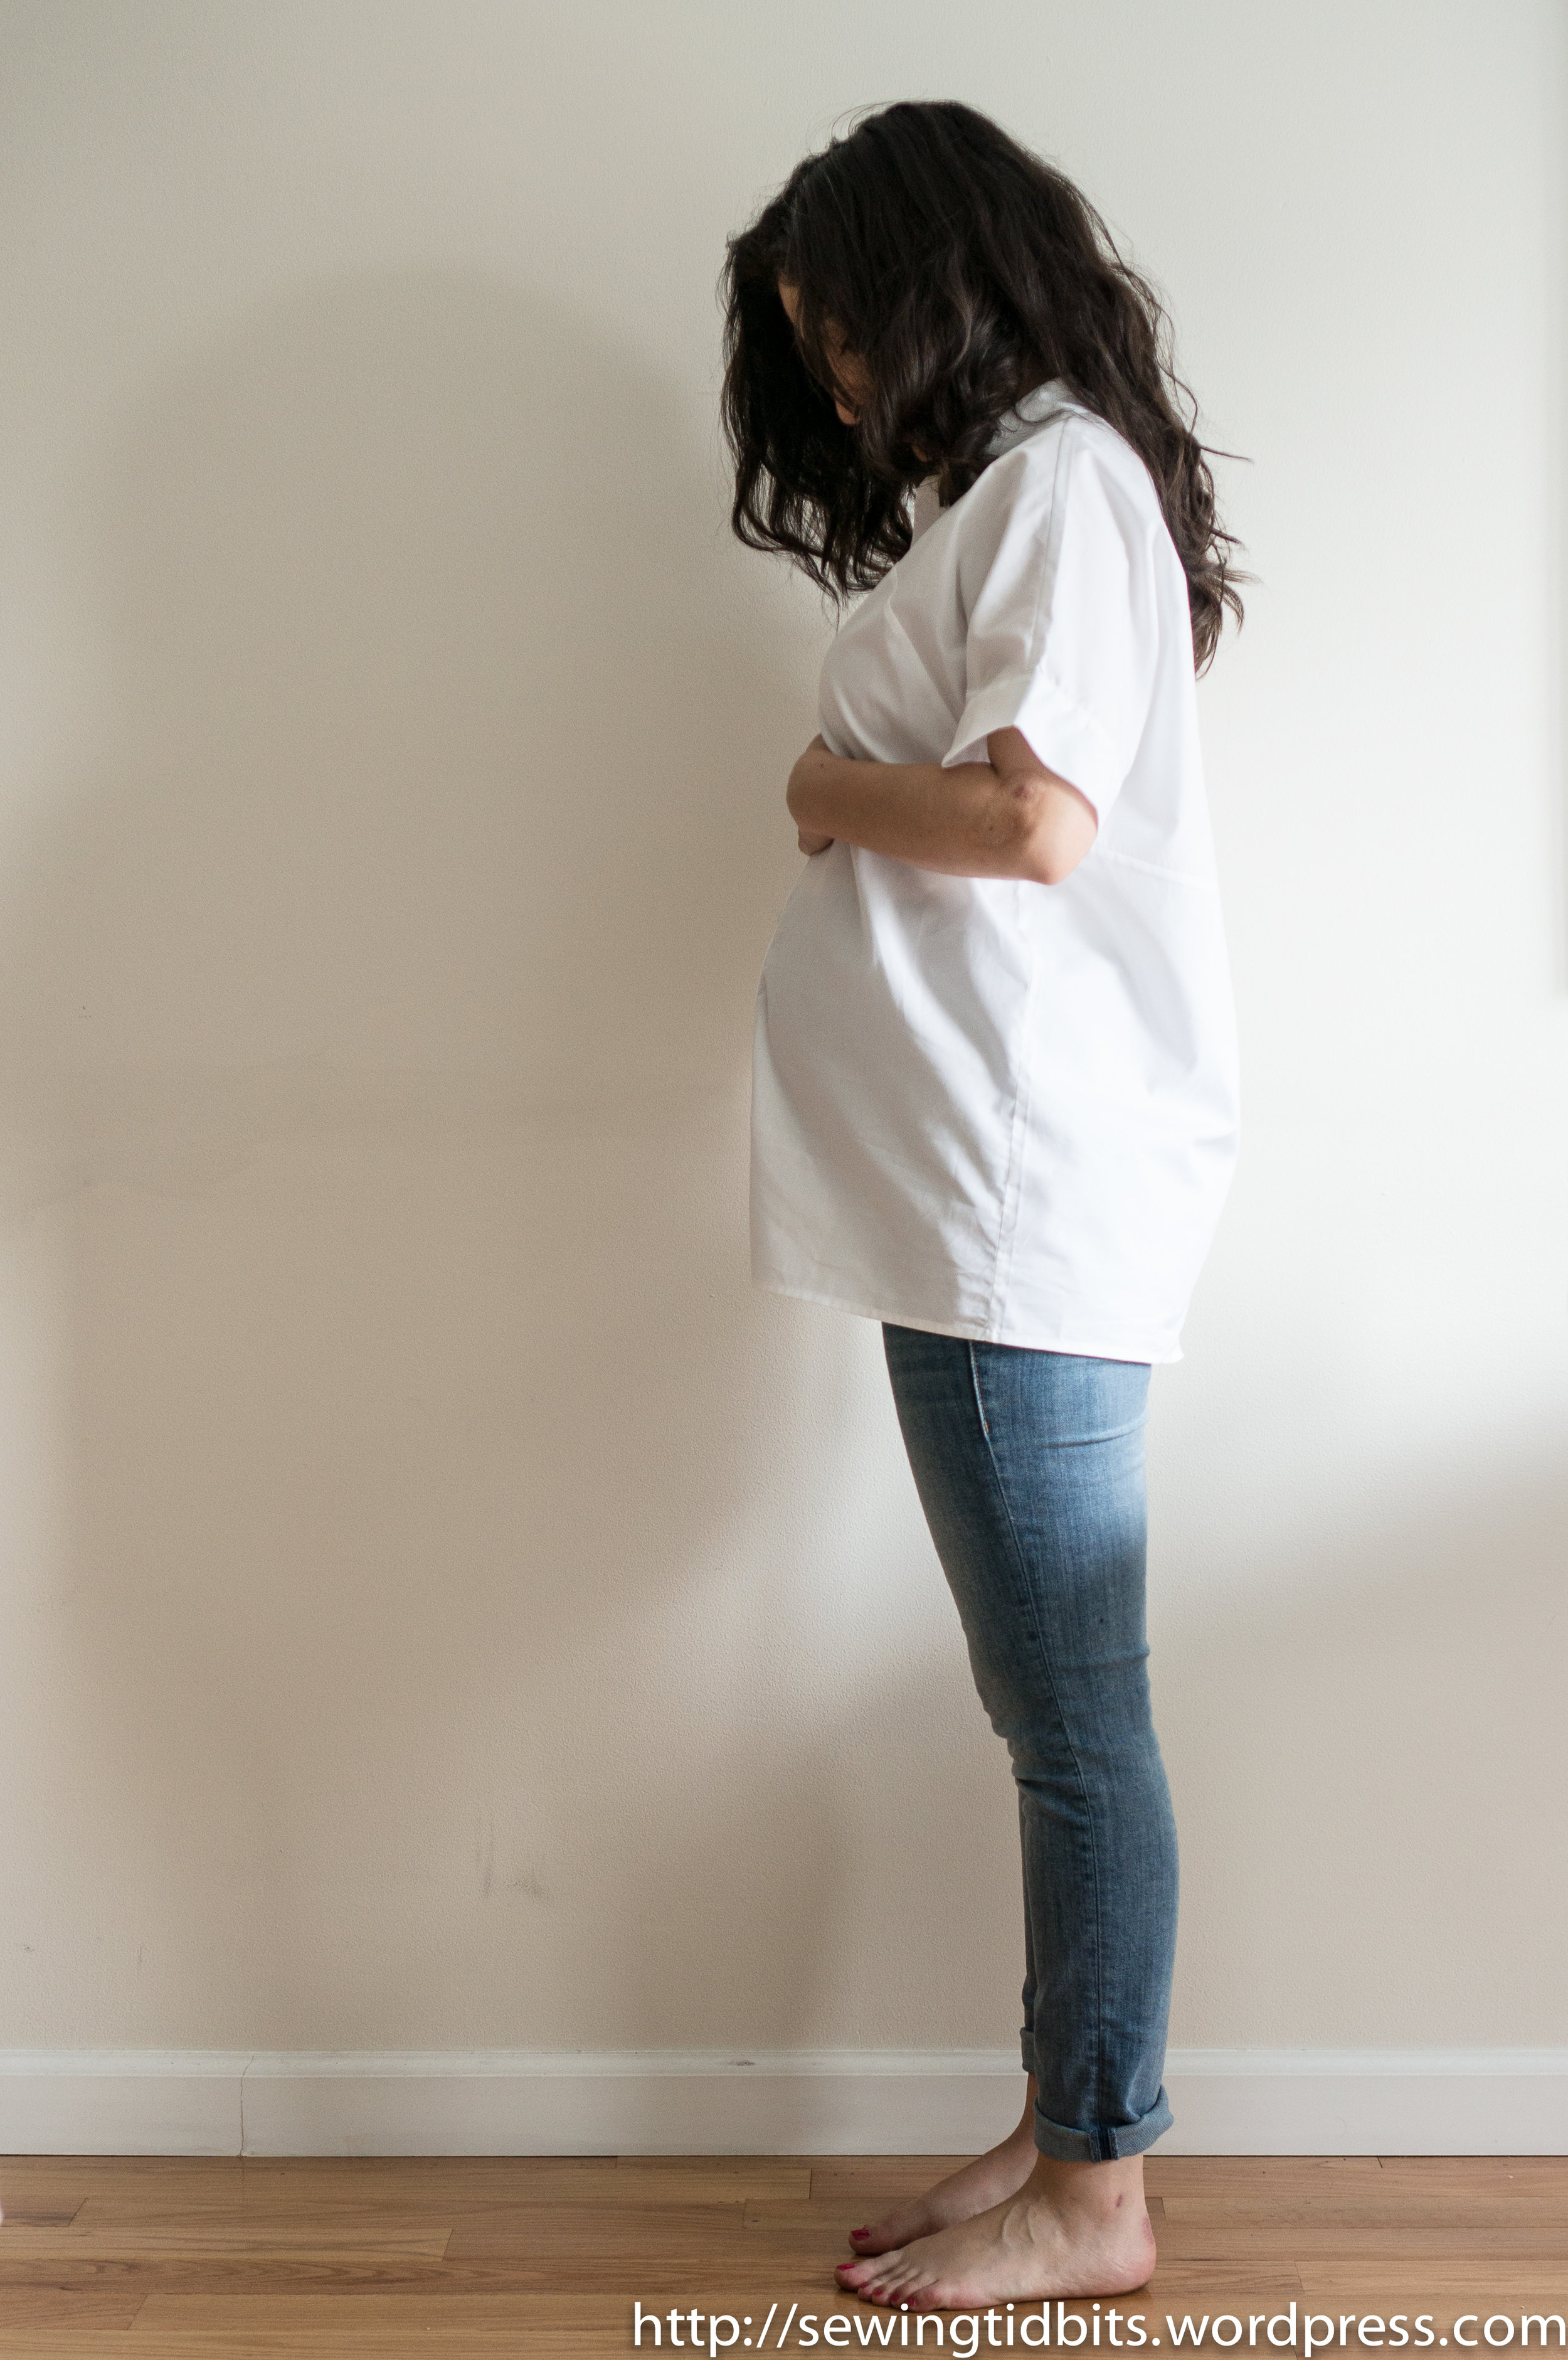
A simple black Nettie dress

Sewing Tidbits

wpid830-black-nettie-dress-35.jpg

Dear readers,Do you realize that as seamstresses, we tend to overanalyze our wardrobe? I mean who else spends these hours reading about the Wardrobe Architect, or every current and vintage wardrobe/style advice ever printed? I, for example, am having a massive style crush on Un-fancy. Even though her style is much much more casual than mine, and I have 0 plans to get dressed with 37 items, I am addicted to her daily remixes and the clean feeling of her pictures. And even after all our careful analyze and planning we get distracted by the latest pattern release or a nice print at the fabric store...Finally let's also be honest about one point: having a blog does change what you sew, because for instance neon color will pop on the screen and social media, as well as pretty prints. For some of us it's ok, because it is actually our uniform, but for others it is not. As I am now just 1 year before 30, and I'm starting to admit that I don't wear that many eye-popping color and prints. I will keep enjoying them on other blogs and once in a while fall for distraction bu, sewing my "birthday dress" meant sewing something that will come out of my closet every time I need to "fancy" up myself!What can be better than a black Nettie dress from Closet Case files then ?? Nothing.wpid830-Black-nettie-dress-35.jpg wpid828-Black-nettie-dress-29.jpg wpid819-Black-nettie-dress-15.jpgI made this dress before, so I did not change anything, except that I did not add bra cups inside. The fabric is a viscose jersey bought in Paris while I was there in June (at Sacré Coupons), and although it is very soft, it is slightly less stretchy than the printed lace I used for my previous version. Therefore, I am trying to feel what the reviewers stated about the arms being on the tight side. However, please note that I use the smallest side of the initial pattern release, before Heather corrected it.wpid826-Black-nettie-dress-27.jpg wpid824-Black-nettie-dress-19.jpg wpid821-Black-nettie-dress-16.jpg wpid817-Black-nettie-dress-3.jpg I have several garments to show here, including some that are not even photographed yet. Last weekend I did try the Named Shadi skirt and made 2 (knit skirts, so fast...). BUT it is this time, you know the one that comes every 8 weeks. I will be traveling to Guatemala (for rest) and Panama (for work). I have hopes to take pictures before and write blog posts during my holidays. We will see how this goes.Now, I would really like to hear about your strategies to make clothes that suit your lifestyle and not be distracted by pretty prints and patterns releases !  

Short Shorts on the line - Retro Burda 07/2013

Sewing Tidbits

wpid790-burda-linen-shorts-4-4.jpg

Dear readers,This is so rare that it is worth noting. I MADE IT FOR A DEADLINE. Ok, at work, I'm pretty much fine with deadlines but when it comes to sewing I believe that I am cursed. As soon as I think about following a sewalong/contest/etc. there are 100% chances that I won't. Hence, new strategy, I make whatever I want and then believe that the sew along gods will align their plans with mine. This is totally what happened with Shorts on the Line! 2 weeks ago I was browsing my burda magazine collection for a color blocked dress (did not find) but then I rediscovered those seriously cute vintage shorts from the issue of july 2013. I'm not entirely sure what is supposed to be retro about them but I know one thing, I LOVE THEM SO MUCH! I've reached a new level of comfort in the daily Caribbean heat that denim cutoffs CANNOT compete with...wpid786-Burda-linen-shorts-5-3.jpg wpid788-Burda-linen-shorts-1-4.jpg wpid784-Burda-linen-shorts-1-3.jpg wpid794-Burda-linen-shorts-6-2.jpgAs you can see my ability to have any picture taken without a beagle biting my heel has considerably decreased over the last 4 months. Along with the one of making it with clean pants from the front door to the car, but that's another story. I also have to apologize for the wrinkles, which are the result of way more than 1 day of wear... (TMI?)The nice bonus about this project is that it felt "free". You may or may not recognize the navy linen I used for this dress, the pattern came from my existing burda collection (justifying to move twice overseas with magazines, yes), zipper and eyes and hooks from stash!wpid792-Burda-linen-shorts-5-4.jpg wpid790-Burda-linen-shorts-4-4.jpgRegarding the construction I did not look at the instructions but shorts are pretty straight forward. I used my usual technique for the fly (see here), the pockets are self lined and all seams are finished with the serger and then topstitched.My only note is about waistband, I HATE (yes hate) waistband. Especially the moment when you try to stitch in the ditch the wrong side folded. It gets distorted, it looks bad, stop me now because I can go on for HOURS. I've been experimenting with different techniques (I know Colette just wrote something about using the invisible hem of your machine but I haven't tried), and these were done with a lot of swearing and using the technique described here for shirt cuffs on which I plan to write very (or not) soon.wpid797-Burda-linen-shorts-11.jpg wpid799-Burda-linen-shorts-12.jpgwpid807-Burda-linen-shorts-13.jpg  I can foresee a another version with single welt pockets in the back because honestly, this was way too satisfying and eventless...Now pleeeeaaase tell me if you have a waistband secret (no hand sewing) that I have not heard about!!!

Lekala 4362 - Michael Kors

Sewing Tidbits

wpid770-lekala-4362-side.jpg

Dear Readers,I made a terrible mistake. The sign that my pinterest board has become too big for my eyes has come. When I said that I was going to make Lekala 4362 because it reminded me of a Ralph Lauren design, I was terribly wrong... It was Michael Kors. Let's see it in pictures :
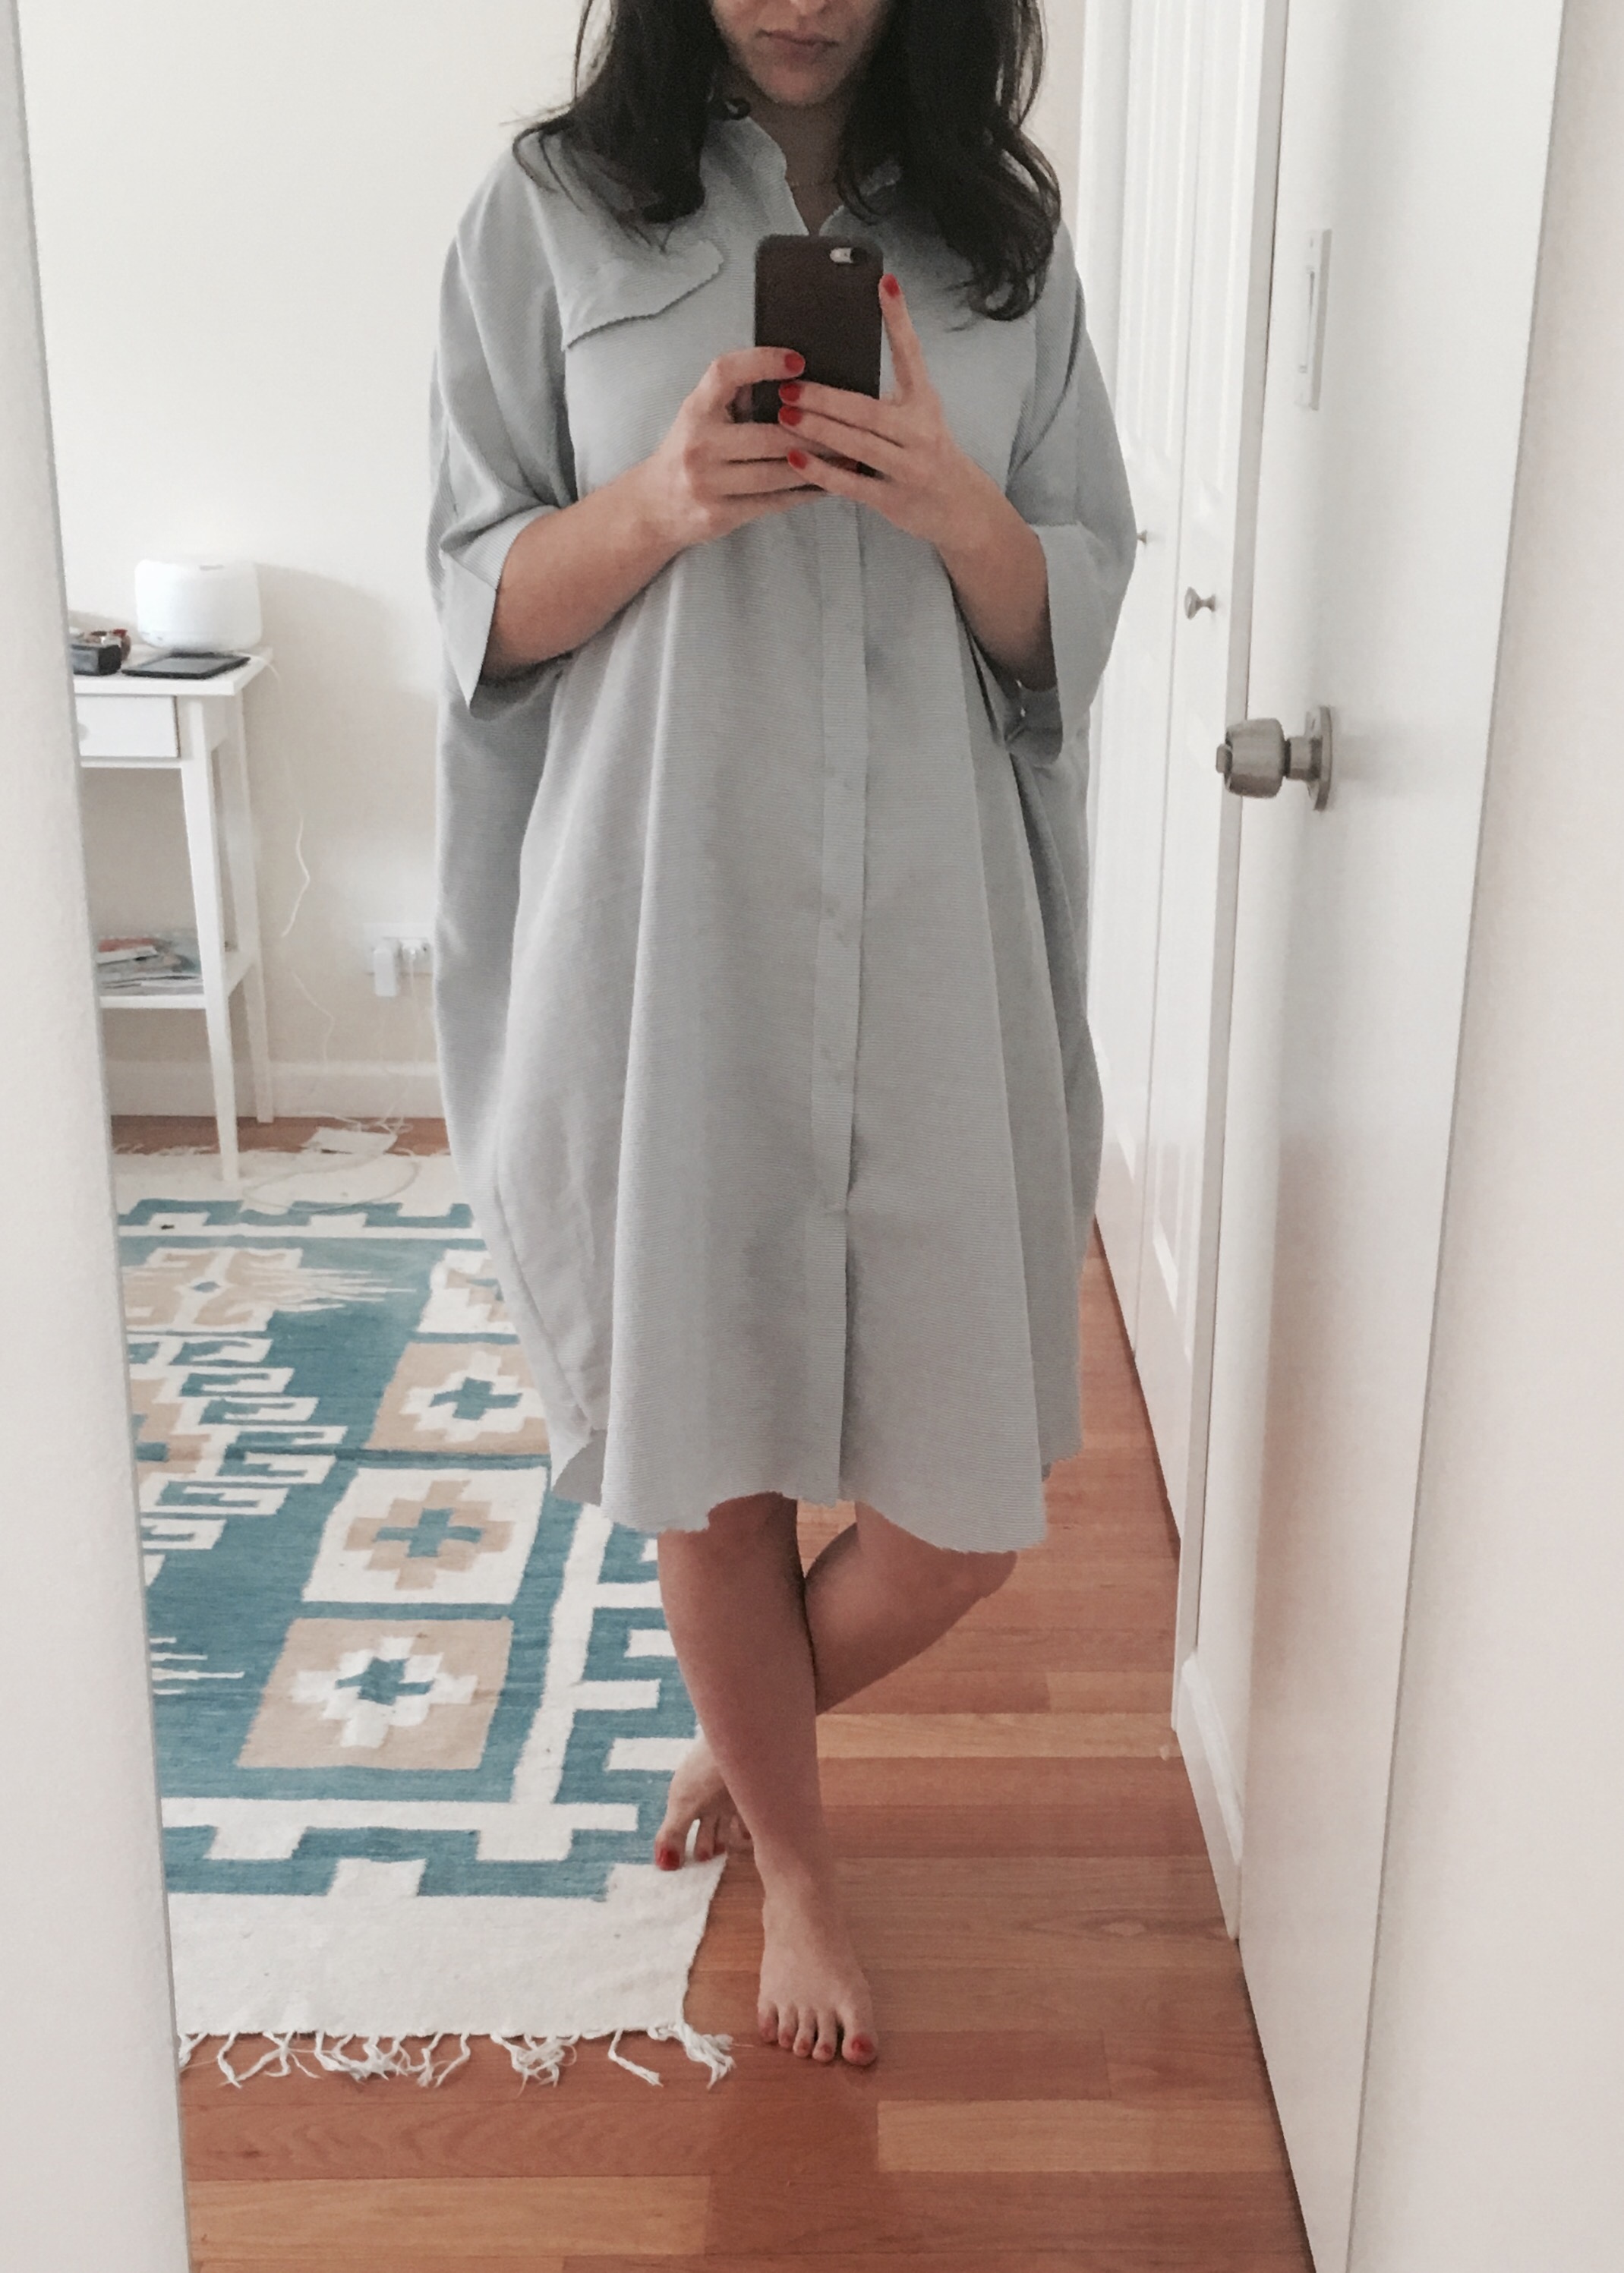
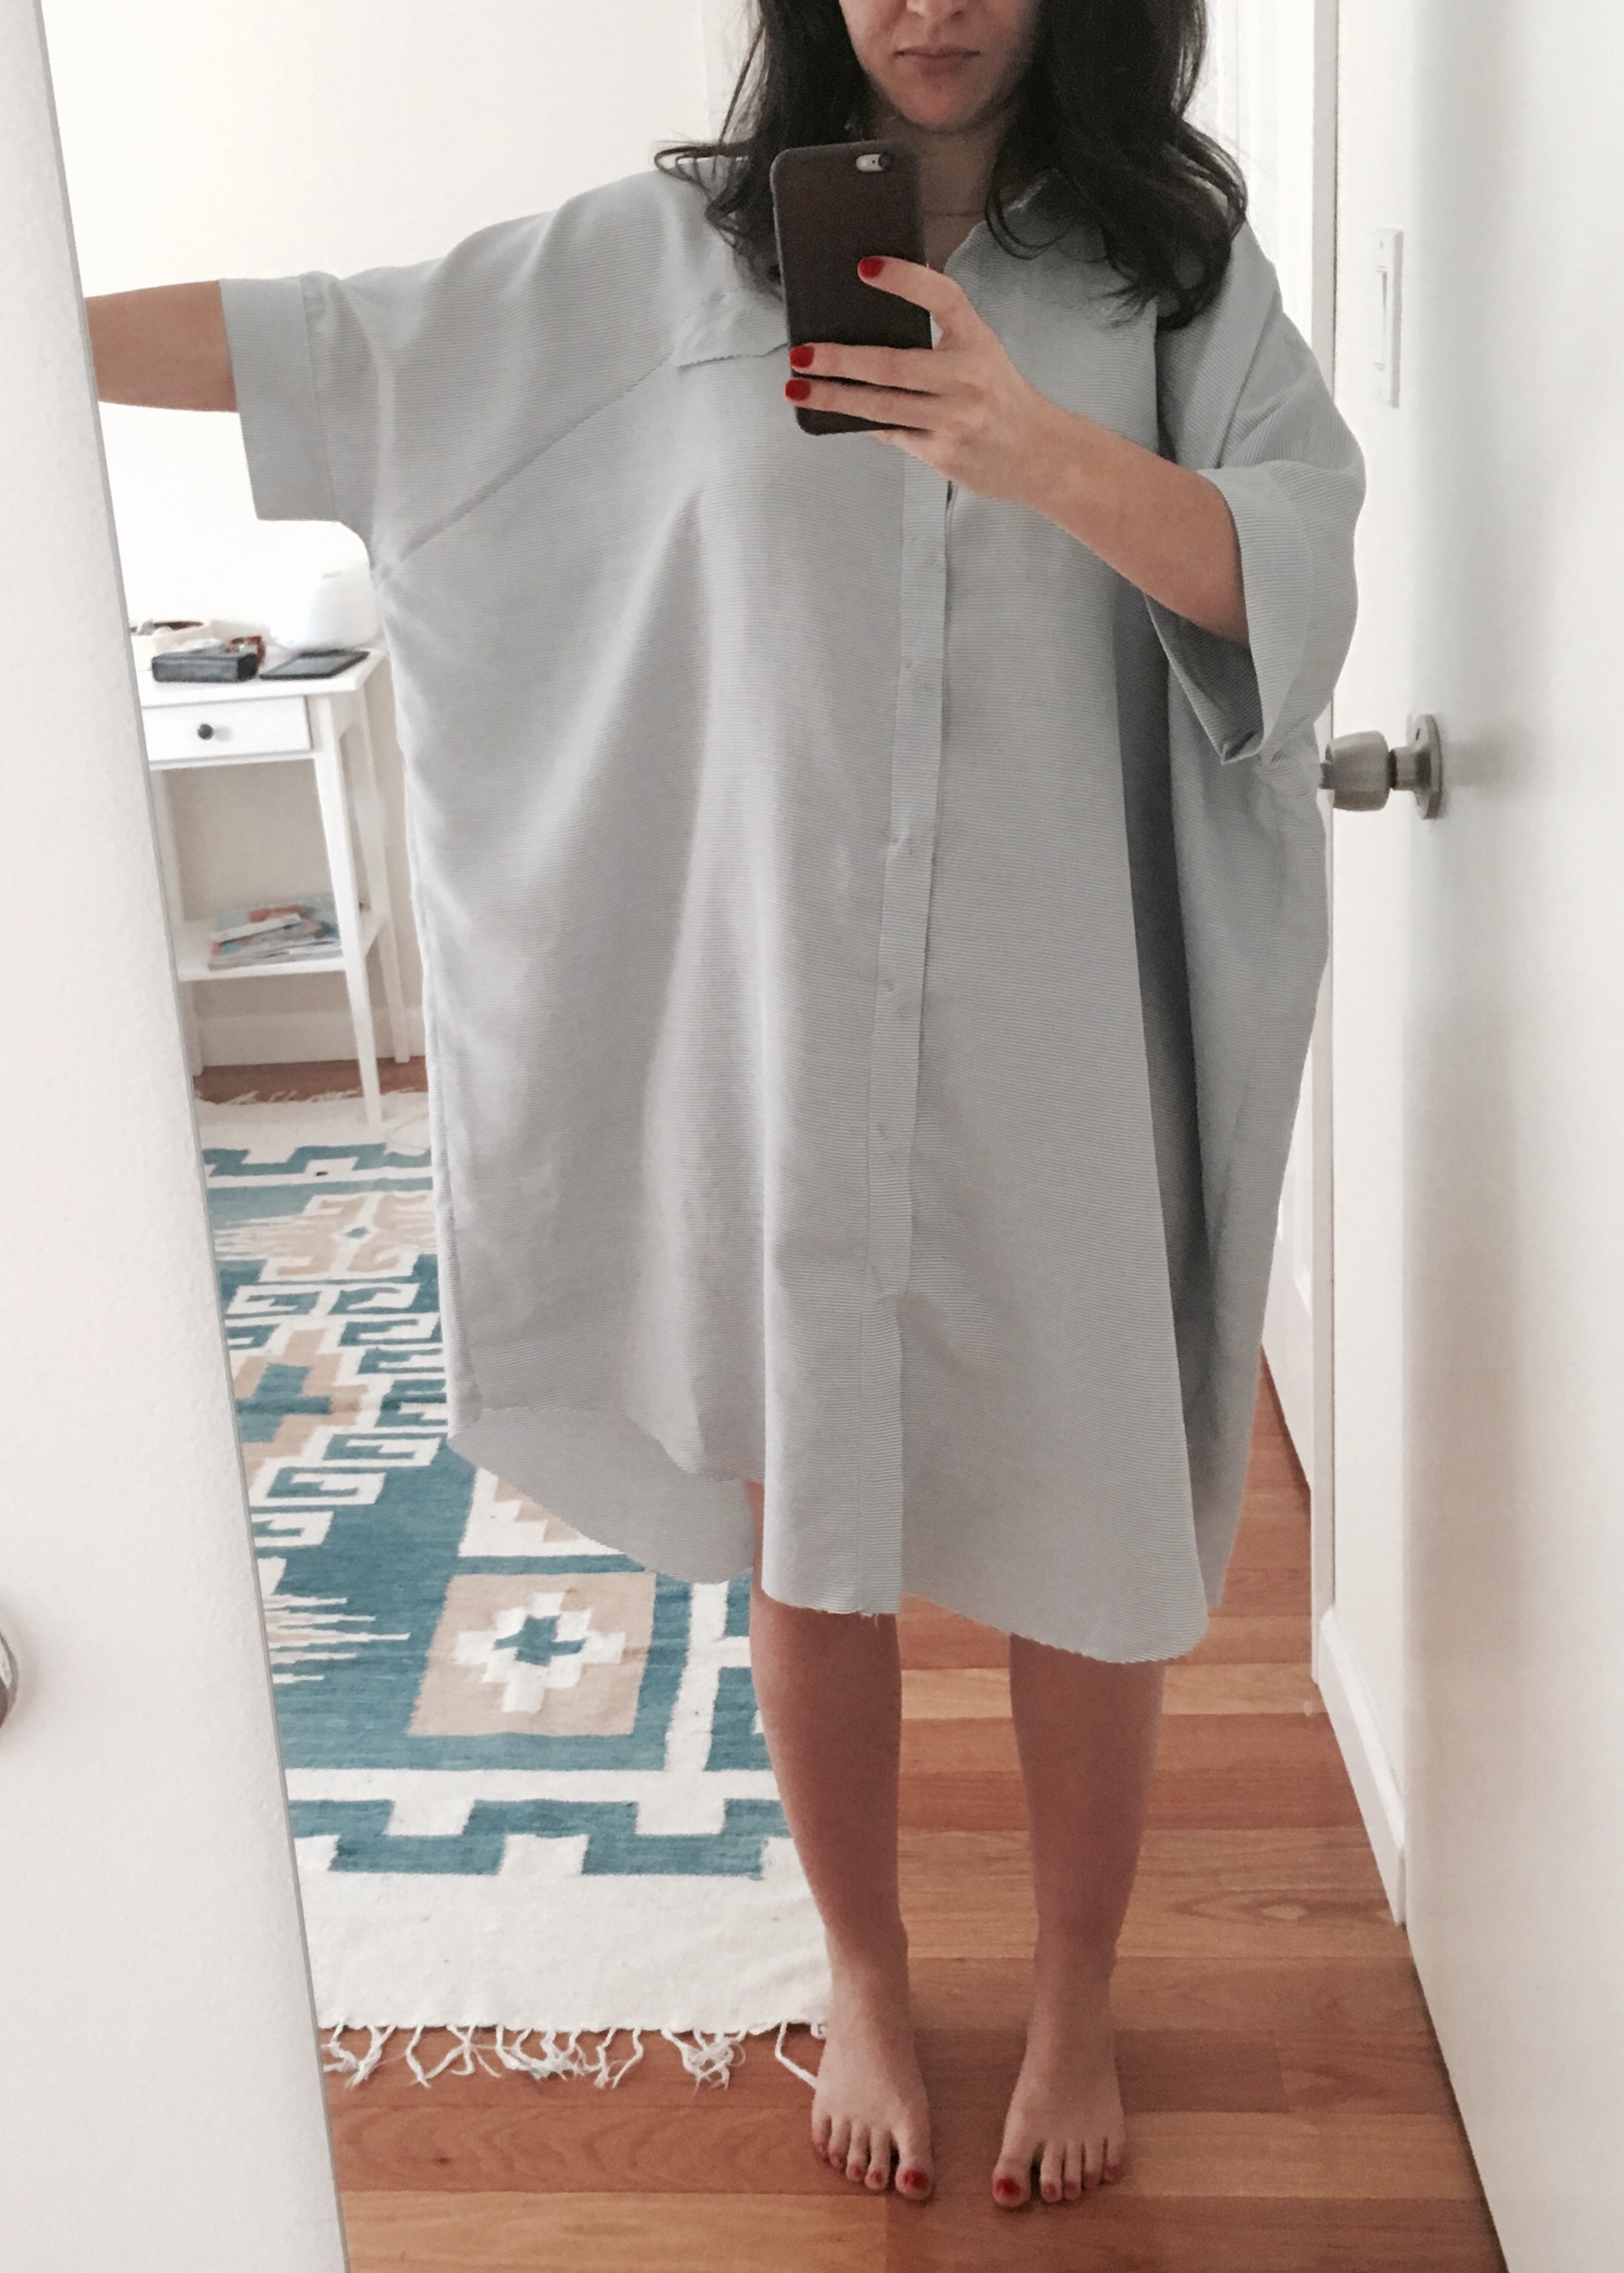
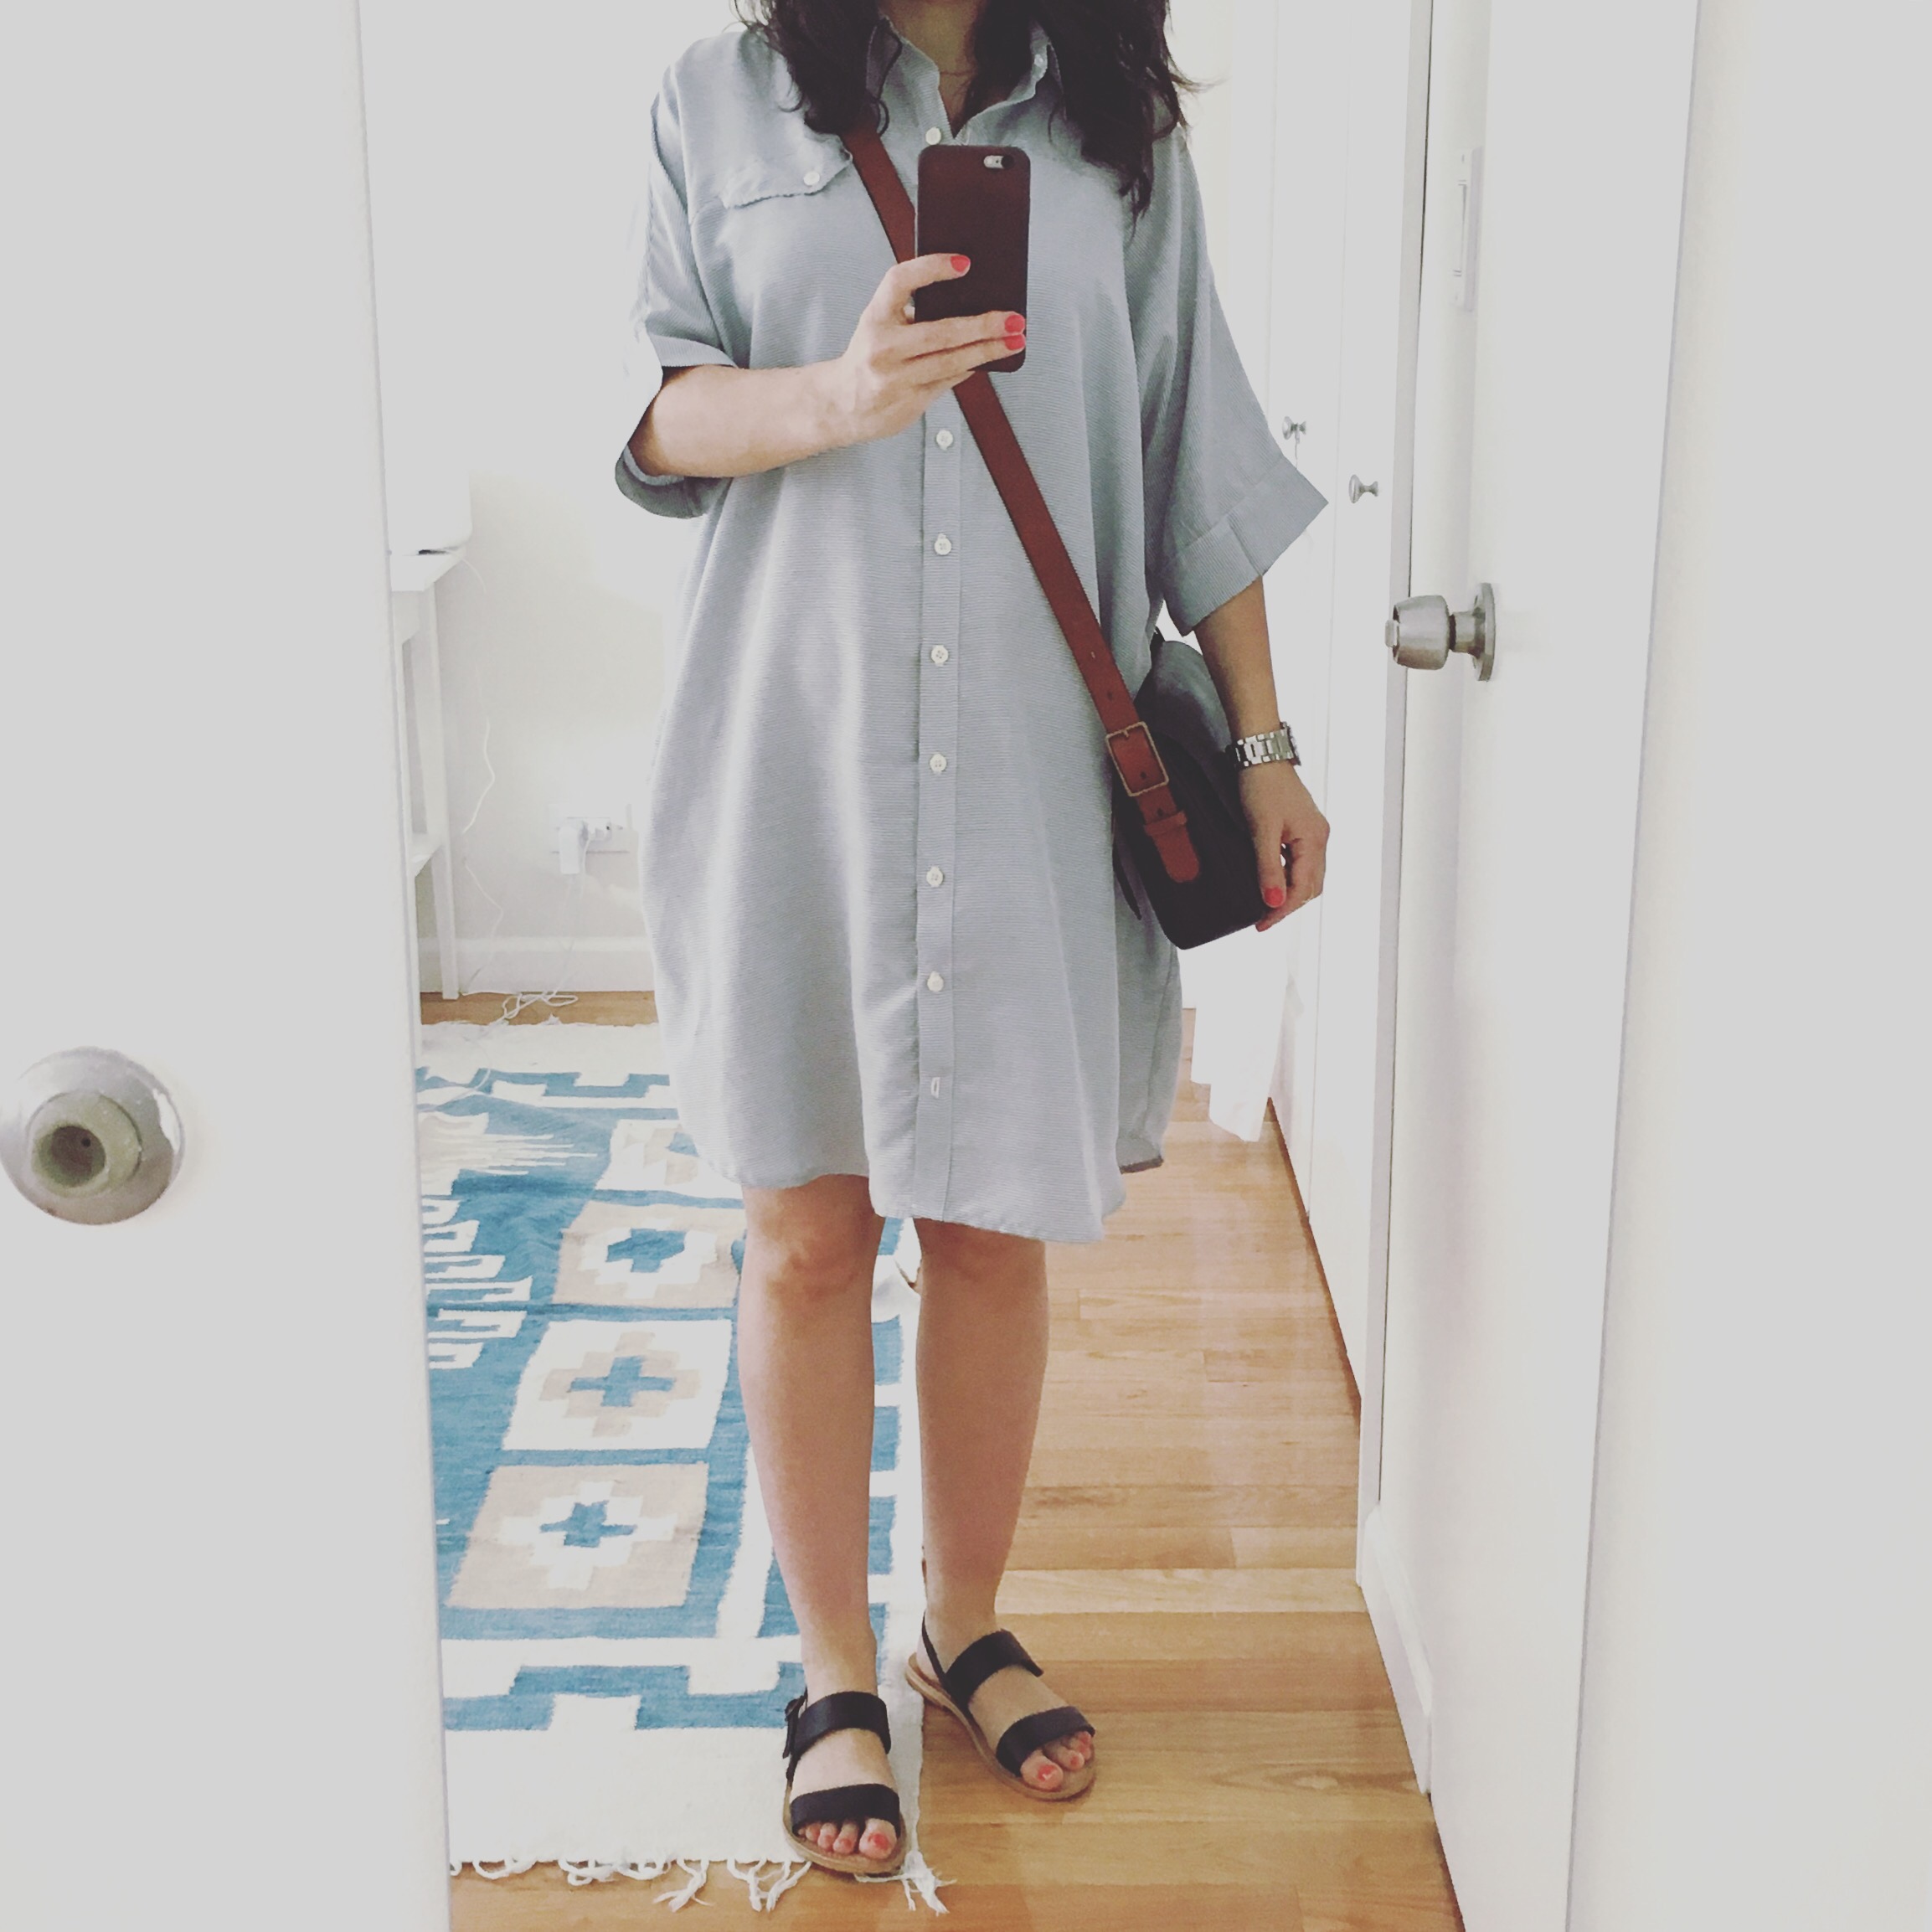
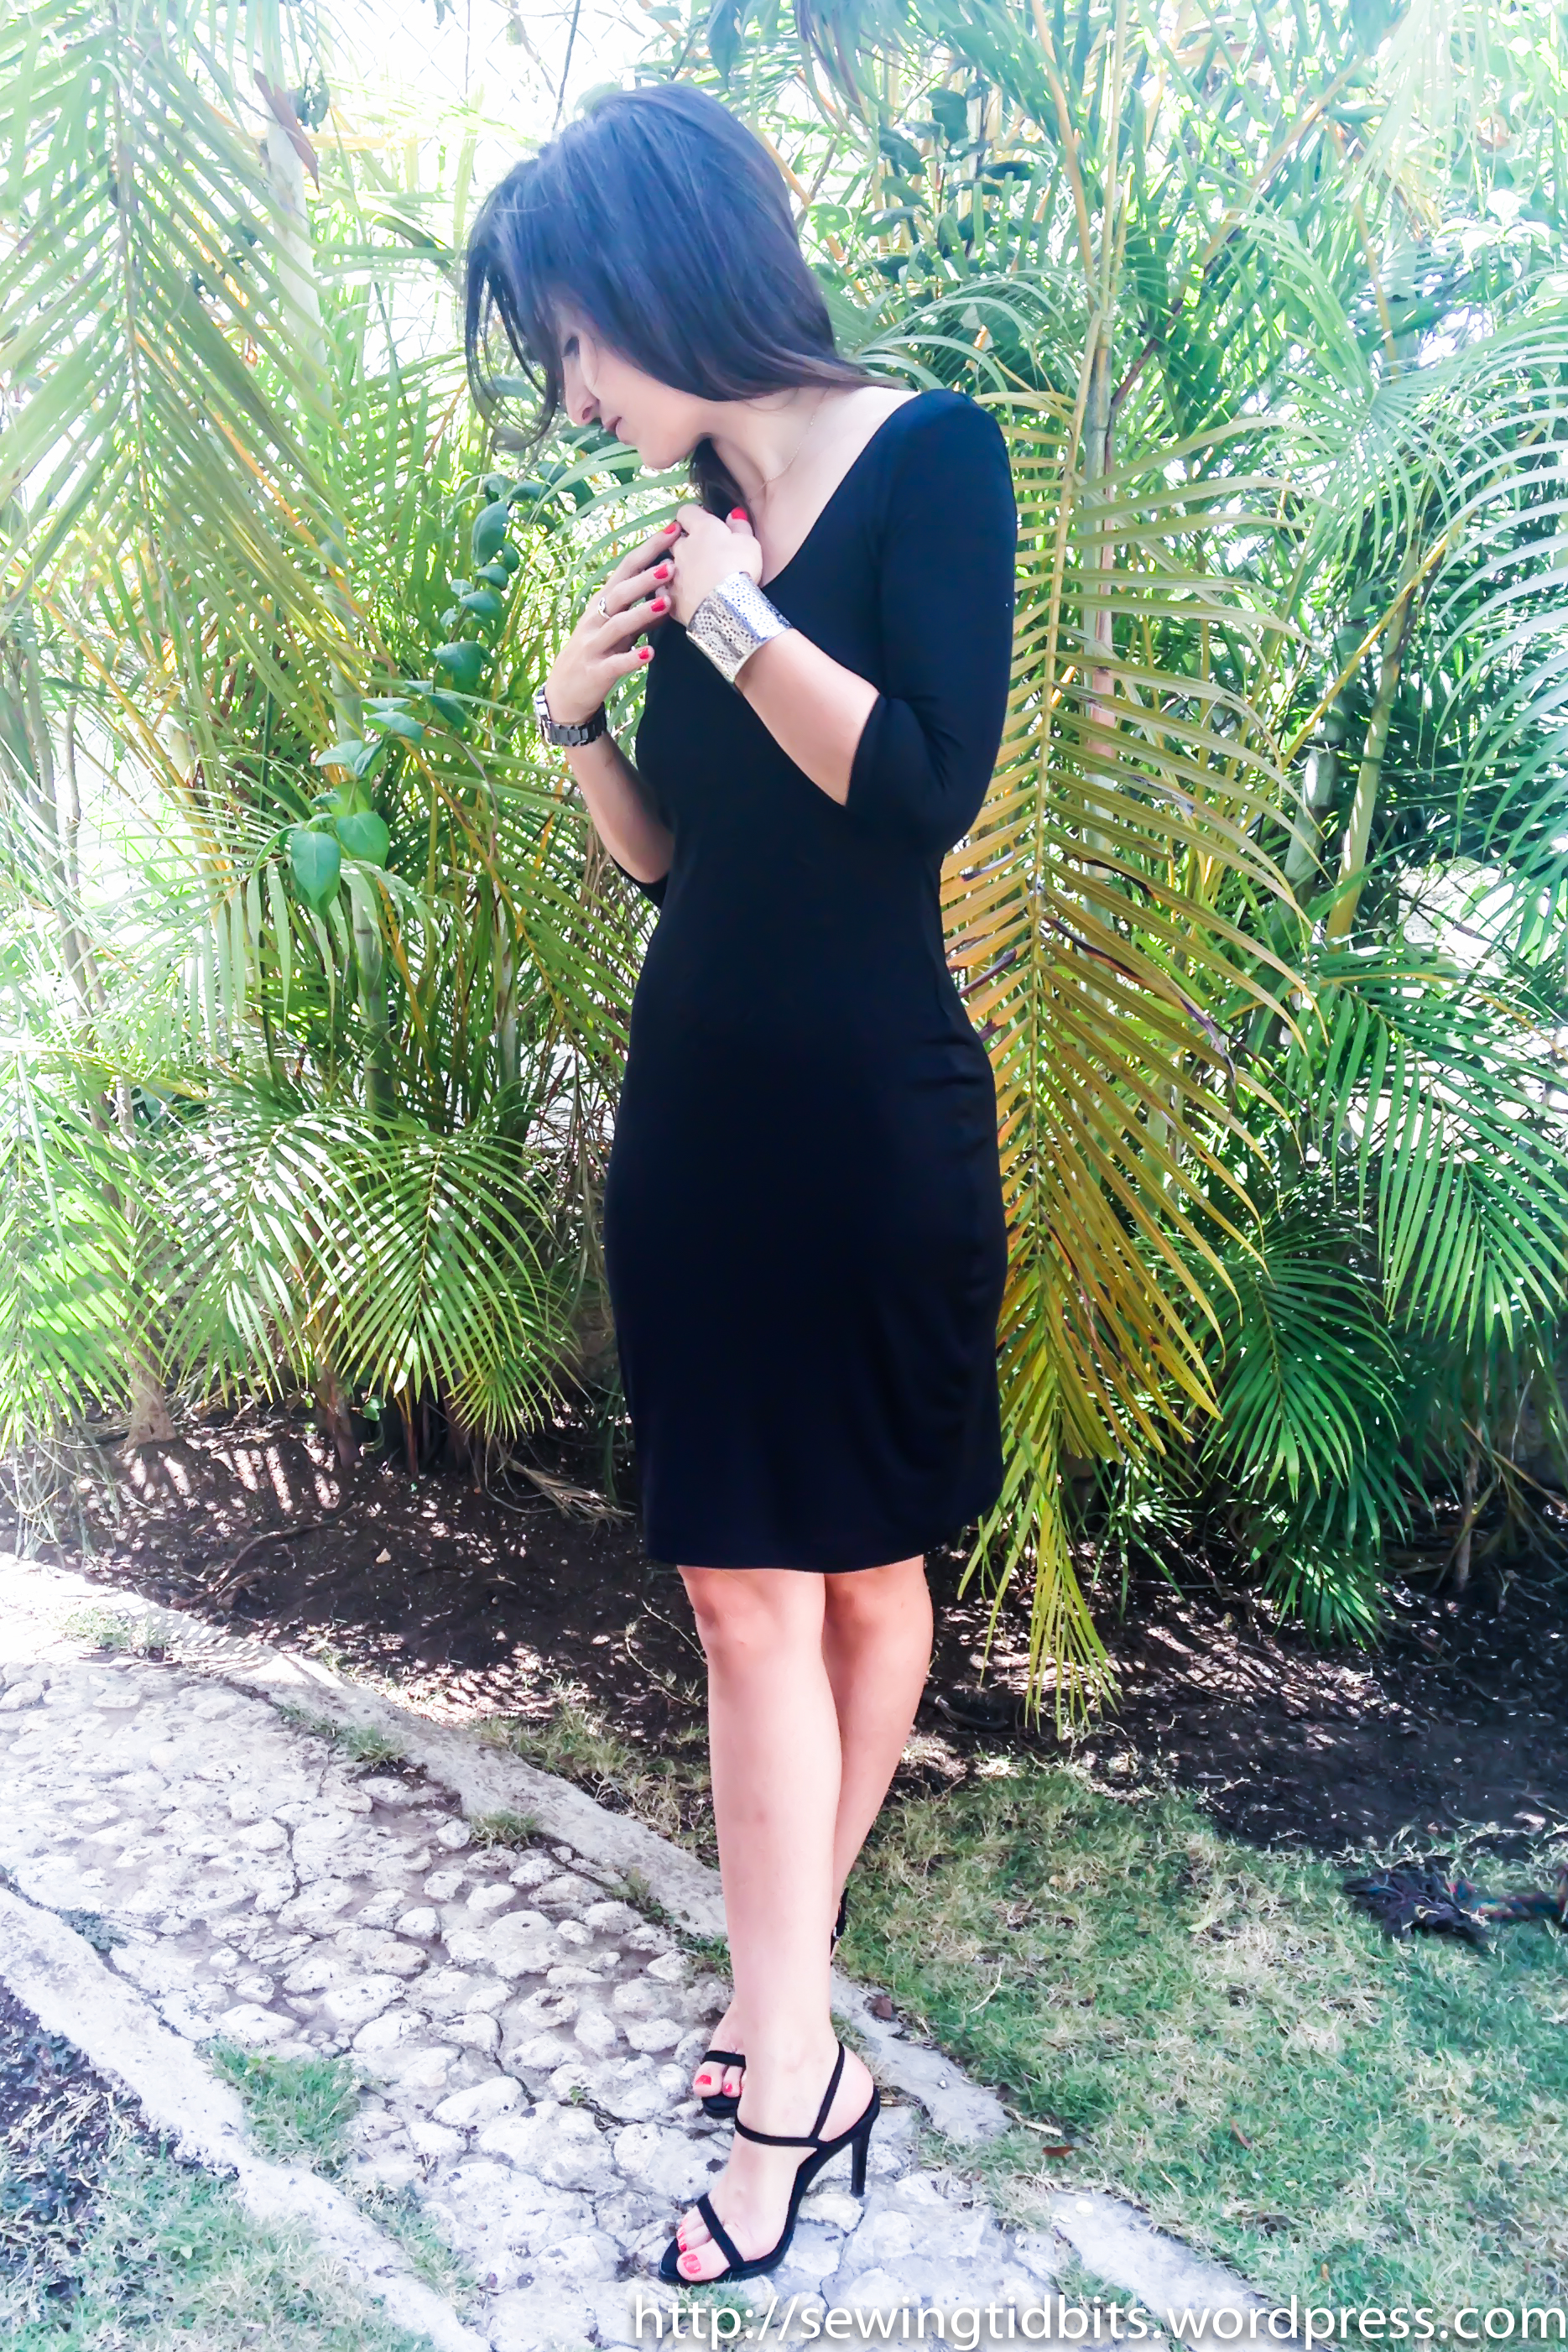
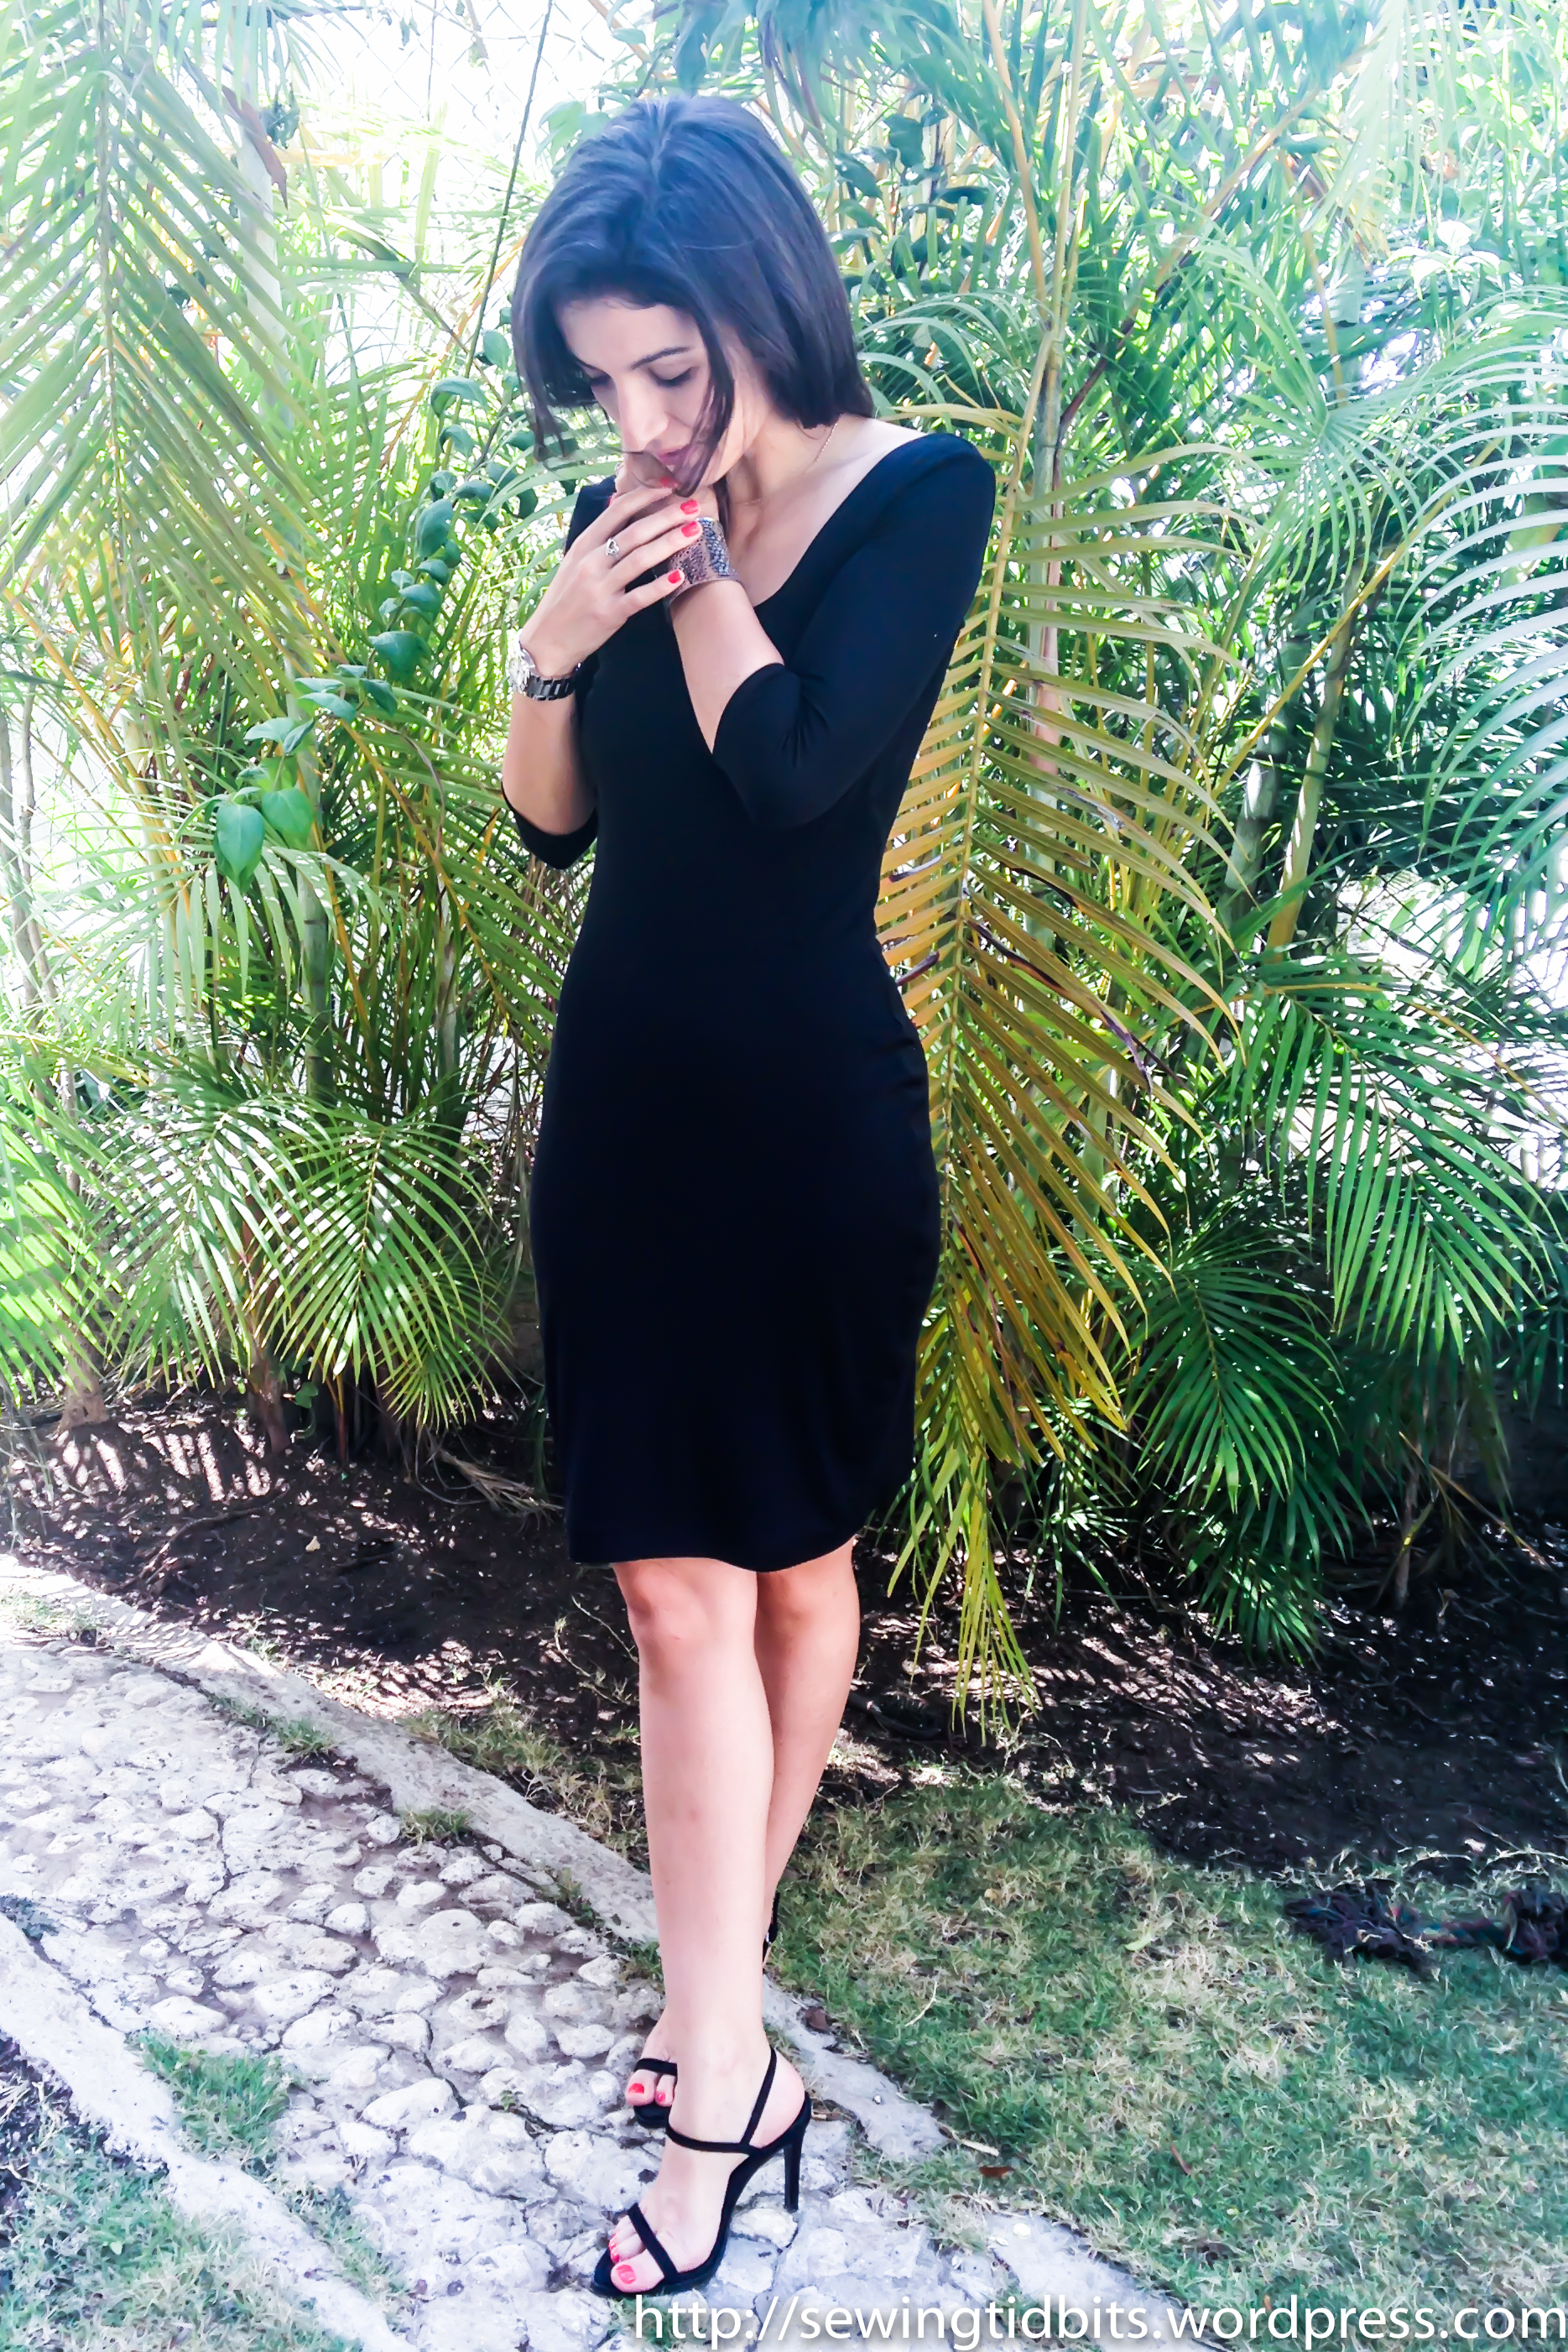
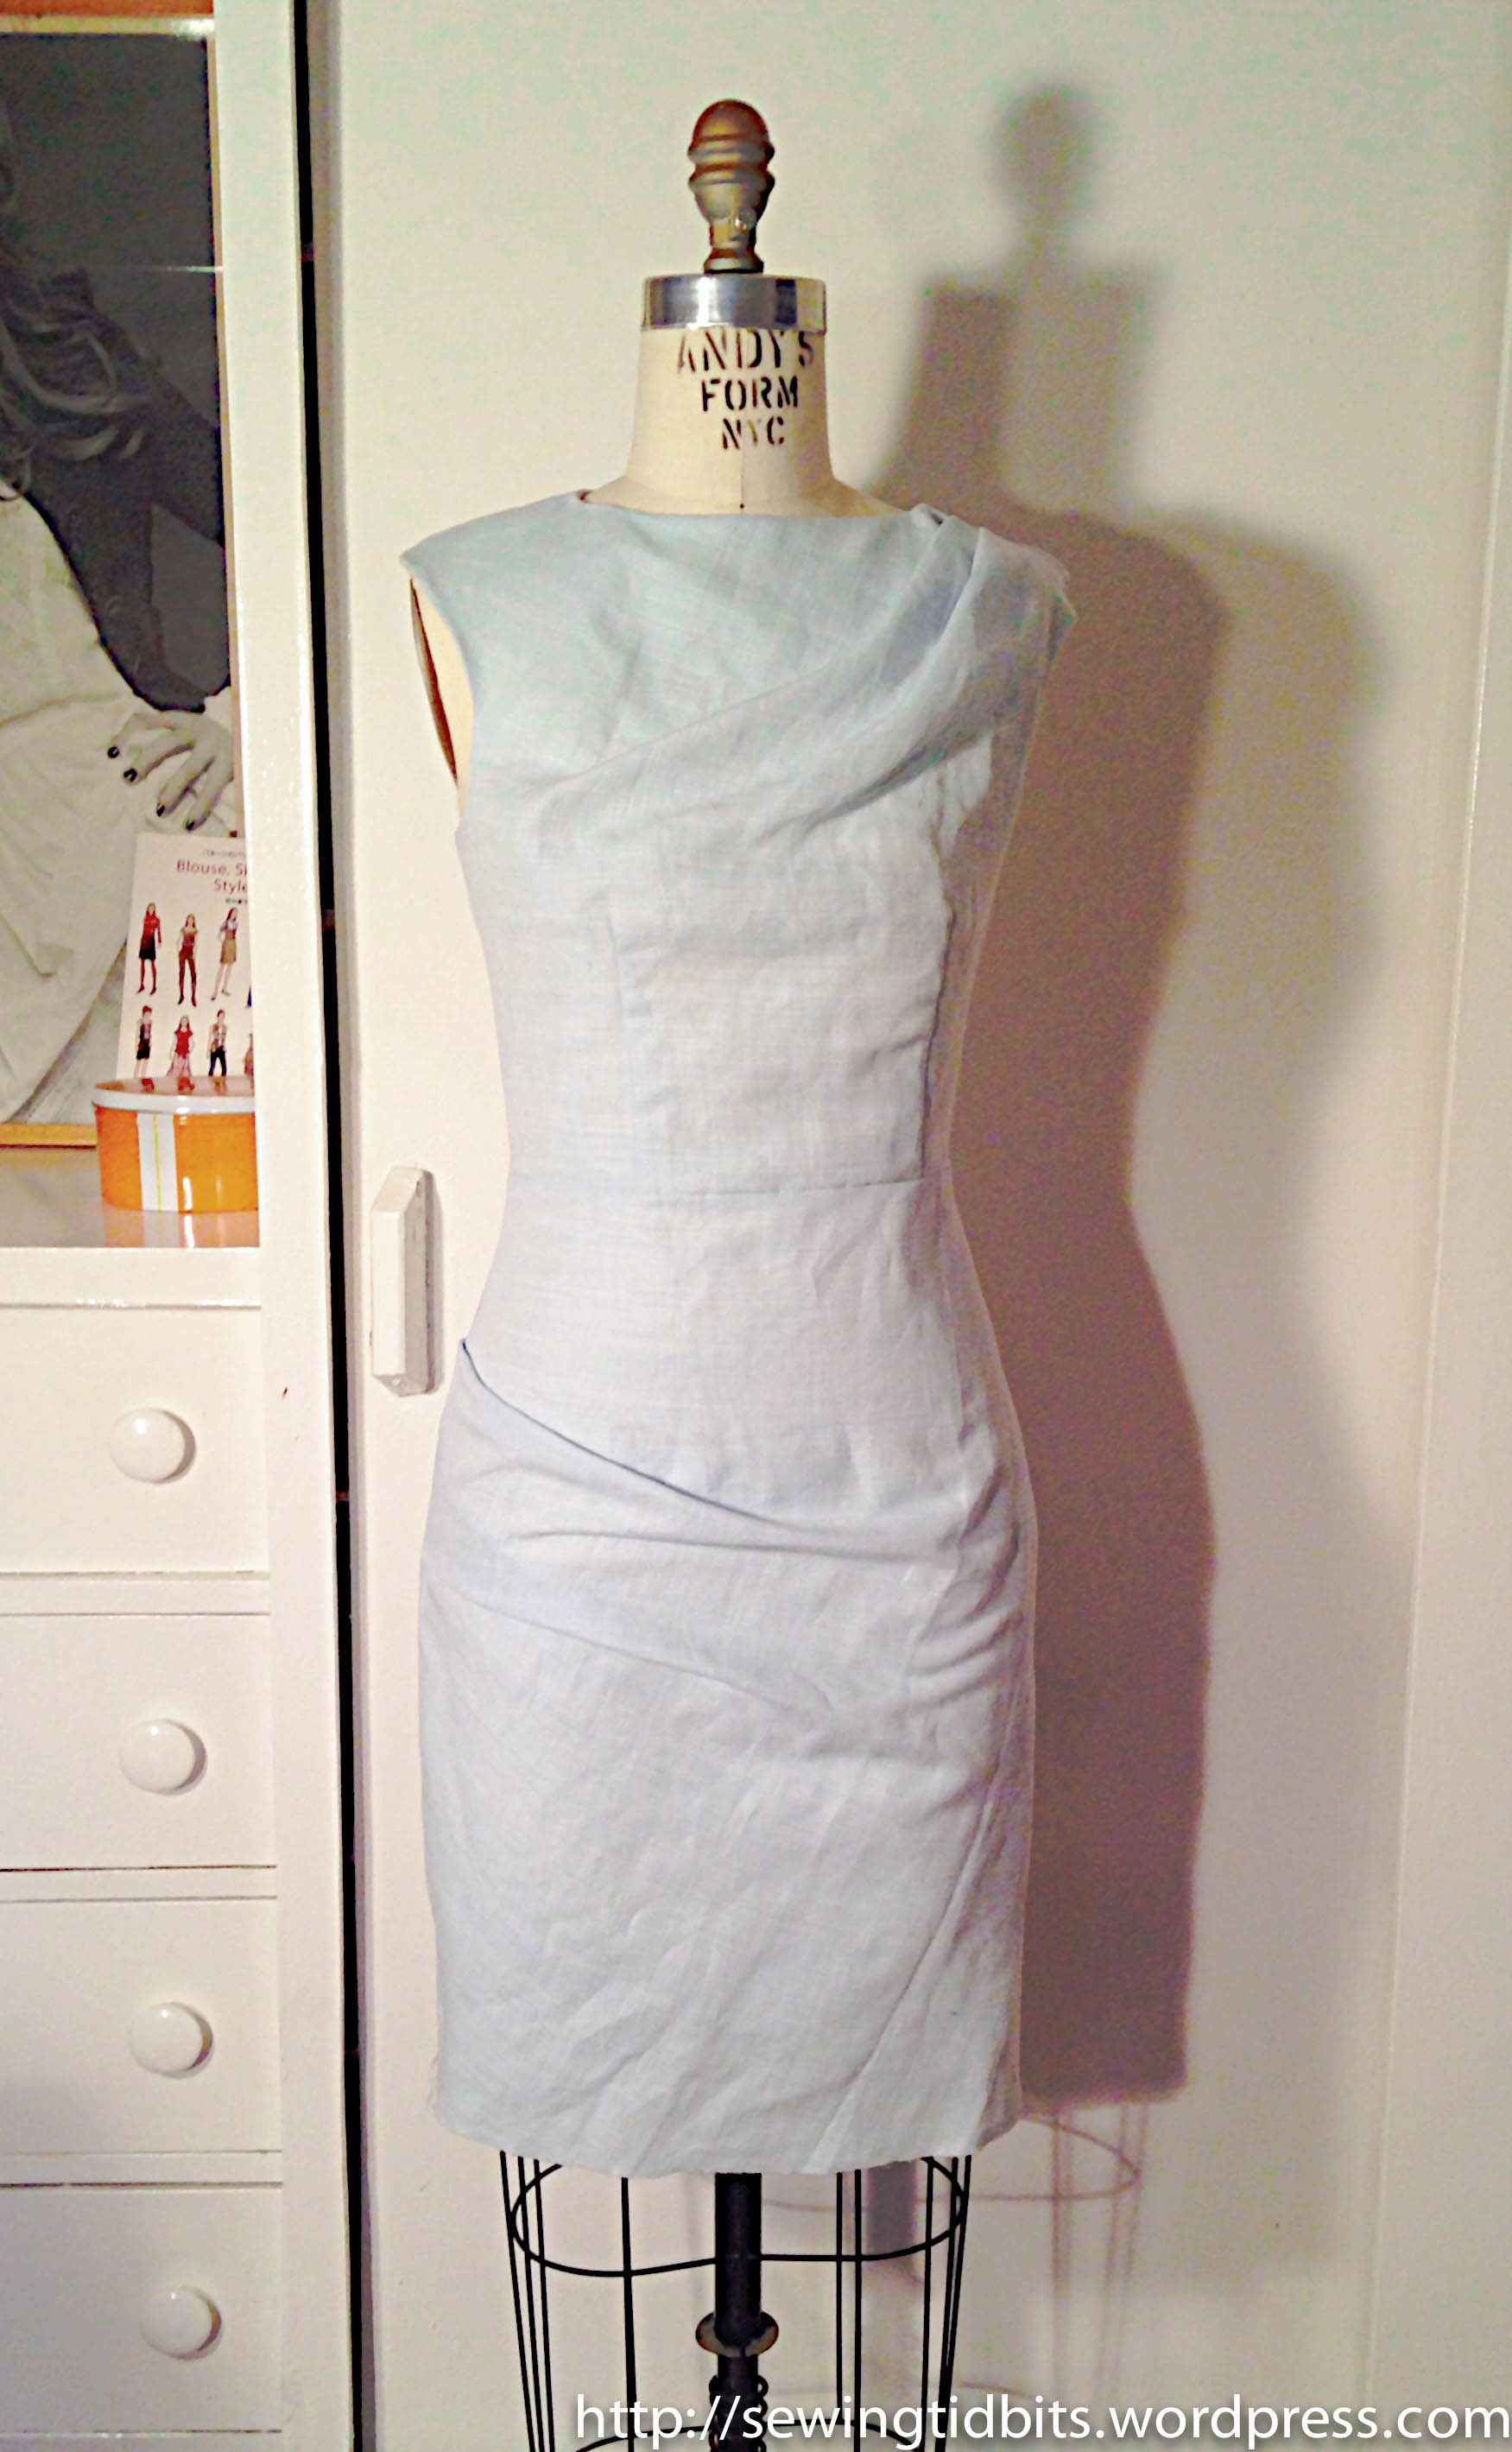
Now that I confessed my mistake, let's look at my version, my Michael Kors knock-off very own Mickael Chors dress.wpid766-Lekala-4362-front-main.jpg wpid768-Lekala-4362-back.jpgThe differences that you can notice with the original "inspiration" are 1/ the pleats at the shoulder and 2/ the symmetrical hem. Although number 2 is deliberate, I have to admit that number 1 is probably linked to my limited non-existant understanding of russian...The fabric is an extremely lightweight denim bought before I moved out of NYC at Moods. I know it looks like linen but it's not, I promise!wpid772-Lekala-4362-front-second.jpg wpid776-Lekala-4362-closeup2.jpgwpid774-lekala-4362-closeup.jpgOn the opposite of my Lekala experience, this pattern required quite some work before I "made it work". First, as you know the patterns are generated automatically to fit your measurements, which I believe is fine when doing simple shapes, but becomes a bit more complicated when there are slashes and pleats and rotated darts all over... So that means WALKING ALL THE SEAMS, to make sure they match.The good thing is that I could still trust the fit enough not to make a muslin (time is a rare luxury these days). However the bottom part did not come "exactly as expected". On the below pictures the dress is just pinned at the sides on my form :wpid758-lekala-4362-form-before.jpgHum... Not really what I had in mind so I re-draped the front skirt portion and transferred the changes to the pattern to get this :wpid754-Lekala-4362-skirt-redraft.jpgwpid762-lekala4362-form-after.jpgI also took the back in before inserting the invisible zipper and decided to do my usual 4" inches tapering on pencil skirts, adding a slit at the back because it was obviously too late for a vent... I drafted a lining (the front bodice lining is included, one less thing to do) and found the most luscious silk twill in my stash. I have 0 idea where it comes from but if I had to (wondering who would threaten to take my dog if I could not remember where each piece of my stash is from?? The stash police maybe...), I would bet on Paron's in NYC.Oops blurry... The correction is in red!wpid764-Lekala-4362-lining.jpgFor the construction side, it went rather smoothly. I finished the lining edges to edges (the lining is a tiny bit smaller than the dress) because I hate facings. Did I tell you I hate facings? Ok, yes I probably did... But really, I HATE facings. The invisible zipper, the best one I ever sewed according to The Old Man, was inserted following the technique that I mentioned several times. Because it's the best. Yes. It. Is.One last thing, there is a new feature on the russian lekala website (leko-mail.net), if you click on "order" for a pattern, then under the technical drawing the last icon before the "save" button takes you to a page where you can CHANGE THE COLOR OR THE PRINT of the illustration. OMG. SO MUCH FUN!!! Go and try it for the dress I just made, and it works for all their recent patterns!Sometimes I wonder how a company can be so advanced on their core technology (automated made to measure patterns!!) and so behind with their website designs and marketing... What do you think ? Do you enjoy this fun feature ?Come back soon because I've been away from the blog for the only valid reason: I've been sewing a lot (well at least for my standards)... More later!

And this is how you lose sewing focus...

Sewing Tidbits

20140630-185836-68316288.jpg

I was in France. For 3 weeks. I bought fabric (of course). I came back less than a week ago and pre-washed all said fabrics (gold star for me). I started working on an apdapted Archer pattern for 1 or 2 shirts out of the new fabric.Proof #1Practising Plackets à la Off-the-Cuff mode...And Proof #2 Removing shoulder length...And then i visited Lekala's website and saw this :Good by focus... HELLO RALPH LAUREN INSPIRED SHEATH DRESS!!!I'm off to check my mailbox compulsively until the custom sized pattern arrives. It's been 6 minutes and 48 seconds. WHY IS IT TAKING SOOOO LONG??!More to come....