If you are not familiar with the concept of Franken-Pattern Making (you can read about it here and here, unfortunately the original post from Sew-4-fun is no longer accessible), it consists of using sewing patterns for the design details only and mix them with a pattern you already know fits well (your personal blocks/TNT patterns if you want). It's actually very close (if not the same) to what Carolyn does with her Pattern Sandwich method. It particularly suits my sewing style because 1/ my sewing time is limited and 2/ I don't always have the courage to make a muslin. I also tend to spend a lot of time on the pattern. Taking classes at FIT (draping and patternmaking) really taught me patience when it comes to working on the pattern. I remember reading one day on Fashion Incubator that you could break up time like this :
1 hour of pattern making, 1/2 hour of cutting, 1/4 hour of actual sewing.
It was enlightening! I drafted blocks in the past, trust me! I started early, by the time I was 15 I decided that pattern companies had it all wrong (haha, teenage overconfidence... I also thought that sleeves were stupid because they could not fit in armholes, STUPID SLEEVES!). As a result I got books and I started drafting, some of the result were TERRIBLE (this was my first book, not good...), some were good (with this book, this one, or this one). But at the end of the day, where are those drafts ? I DON'T EVEN KNOW!! I spent looooong hours making them and turning them into usable patterns. I want to start from something that is already a pattern!
I said it before, I believe that Lekala patterns are particularly suited to play the role of starting blocks (haha, pun intended) or be used for a Focus on Fit approach, because :
- I'm very happy with the fit of the made to measure feature. It fits almost perfectly without alterations
- They have a wide range of styles, so I can start from something already close to what I want
- They are relatively cheap, they don't add much to the overall cost of the project.
- I can print them with or without seam allowances. If I'm going to do a lot of changes I prefer to have none.
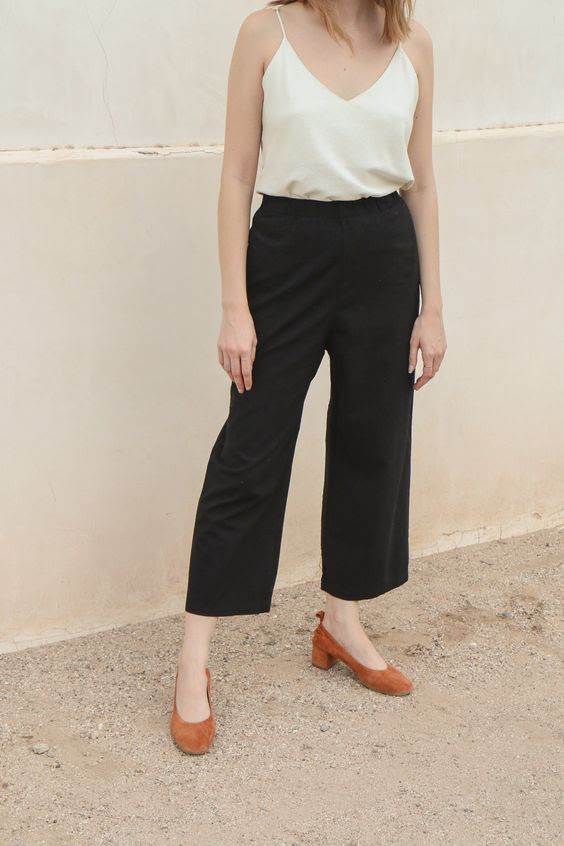
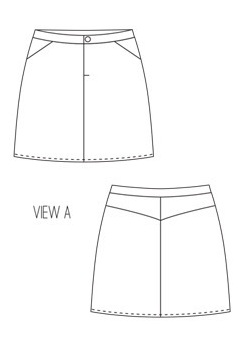
But let's take a practical case so that I can explain myself better!For Thanksgiving, amazing Jen of Grainline Studio organized a sale. I really admire the level of professionalism she brings to home-sewing patterns but I only made the Scout tee in the past. After seeing all the praise on her work (specially Archer), I decided to go ahead and purchase the Portside Travel Set, the Archer shirt, the Maritime shorts and the Moss mini skirt. Over the last few weeks I came to the conclusion that a short chambray skirt was THE basic that I was missing. To be with fair, I have this type of thoughts quite often, sometimes it's legitimate (a white shirtdess, black slacks, a pencil skirt, etc.), sometimes it's more questionable (a shiny midi skirt, leather shorts...). Anyway, my heart is currently set on a chambray mini skirt so I. NEED. ONE. NOW. The technical drawing of the Moss skirt is exactly what I want, but after looking at the size chart and Pattern Review, I know that there are very little chances that this pattern fits me right out of the enveloppe printer. My hips are size 4 and my waist is size 0... So I went on a search on the Lekala website, looking for something as close as possible. I set my heart on number 5430.
 A comparison of the 2 drawings shows the design changes that I'm going to make to the Lekala pattern. But in addition, I like to embed construction in my pattern as much as possible. This means often changing the zipper parts, reducing seam allowances, etc. For this case, I settled on the following changes:Design :
- eliminate the back dart for a yoke
- chop off the top of the waistband
- and add a back seam
Construction
- The Seam Allowances are dependent on the type of Seam Finish. I will serge and topstitche all visible seams on the inside. This means 1/2". The seam between the skirt and the waistband will be encased so I will use 3/8". But the top seam of the waistband will be only 1/4 to eliminate the need for grading it later. Hem will be double-folder : 3/4"and 1/2".
- Pockets : i read how pleased people were with the pockets being attached to CF on the Moss skirt and how deep they are so I want to keep this feature BUT I also liked the 1 piece pocket bag from the Jedediah shorts by Thread Theory I just completed so I will incorporate that too!
- Fly zipper : I know everybody has it's favorite technique, and people seems to feel very strongly about them. My best fly zipper of all times (and it was not only luck since I used it several times) was completed using this amazing book : Design Room Techniques by Laurel Hoffman. I know it's pricey but it's worth every penny. I promise!! Otherwise, I think this one by Notes from a Mad Housewife looks great too!
Now for the visual people out there, I took pictures of the process. First this is what a Lekala sheet looks like for a pattern without seam allowances : I started by drafting the yoke and closing the dart (TIP: close the dart first, which is not what I did on the picture below so I had to redraw my curve completely...)
 Then I added seam allowances on the back pieces and compared with the Moss pattern :
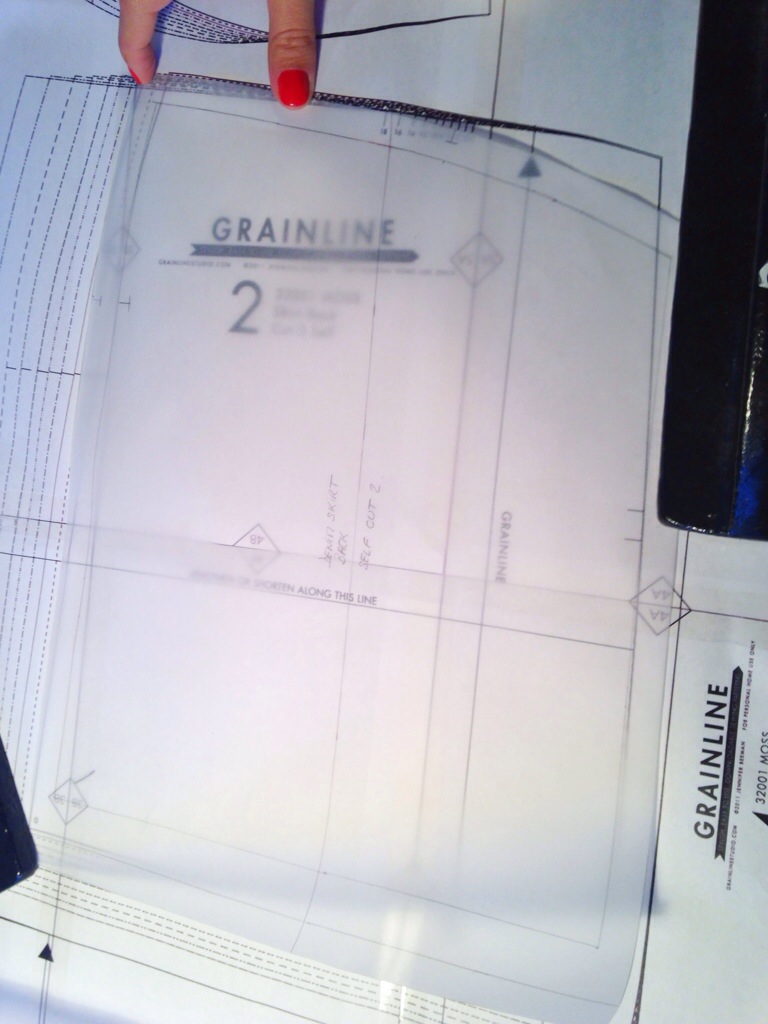 My yoke is a lot curvier than the Moss one, which makes sense since I have a bigger hips/waist differential (please not that I should have aligned the straight grains before taking this picture)
 The Waistband pieces have been modified to be thinner and to have the extension needed for the fly zipper. There for there are 2 pieces fro the front and one is longer than the other.
 For the front, I added seam allowances and drafted the zipper pieces from Laurel Hoffman's book, using a 5" zipper instead of 7".
 Interstingly enough, it seams that although the back are almost exactly the same width, my Lekala is considerably larger in the front.
 The key of this zipper method is that right side and left side are NOT identical pattern pieces. I will remove 1/4" on the one of the sides but only after cutting since I'm cutting double layer this time.
 A better view of the zipper set :
 Now the pockets : I did not change the pocket shape from the Lekala pattern as I find it close enough.
 But I redrafted the pocket bag, so that it's deeper, it reachs the middle (Grainline Instructions) but it's 1 full piece of contrasting fabric (I like to use muslin) to be folded and with "facings" of self fabric (Thread Theory Style). The result is this :
 An essential step after all this work is to WALK ALL THE SEAMS and check/correct the notches. This is what will make your sewing really fast because everything will match seamlessly (haha, again).For the fabric I had a very small leftover of chambray from an old old UFO (which I think I finally tossed). The limited amount of fabric will not allow extra for mistakes, all the more reasons to be extra careful with the pattern.
 As you can see on the picture below, I like to cut my waistbands with the grain parallel to the longer side. I think it makes them more stable. You can see all the fabric I have... It's not much!!
 I hope this process post was helpful, as I said in my blog anniversary post, I'm trying to bring more substantial content and not only final results pictures. So I would love to hear your thoughts about franken-patterns, fly zippers, etc. !!